As I mentioned last week, I’m focusing a bit more on my portfolio, so there’s less work done on the game. Here’s a summary of what I did.
Dithering Effect
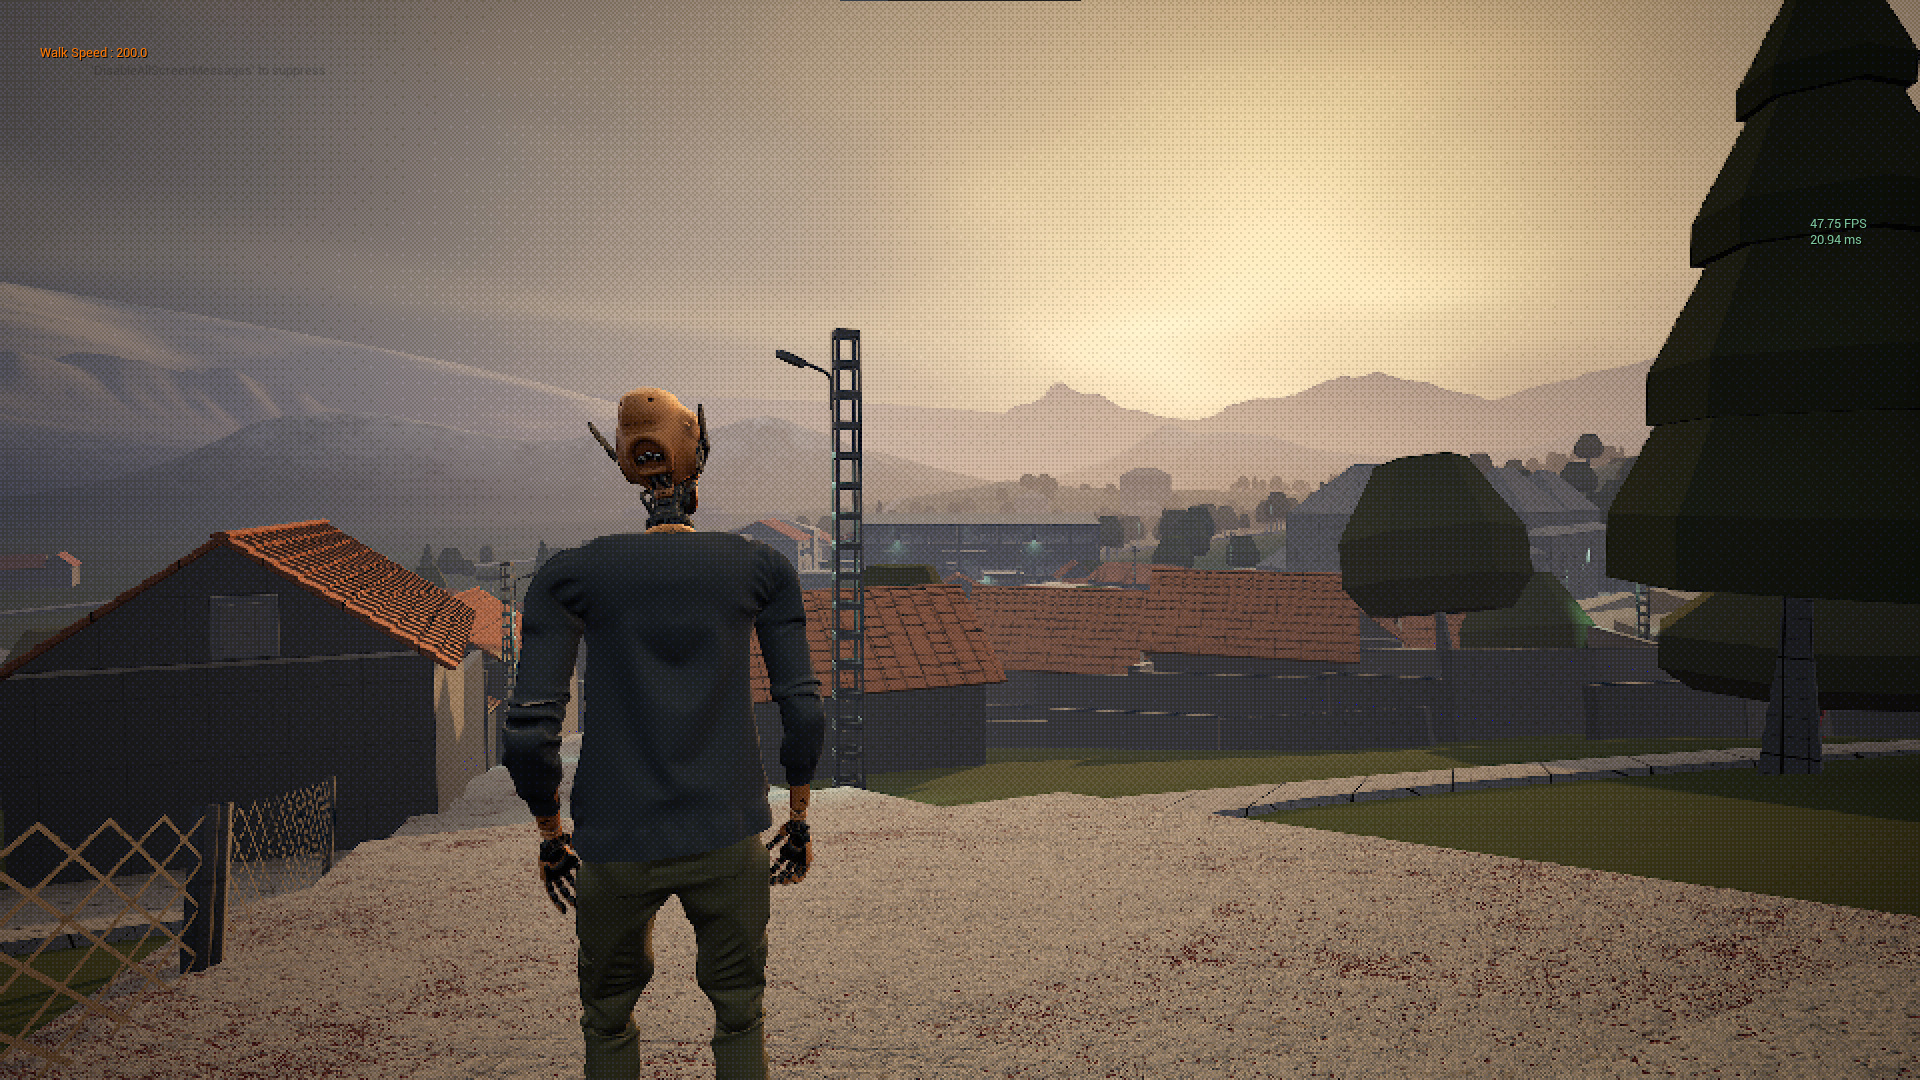
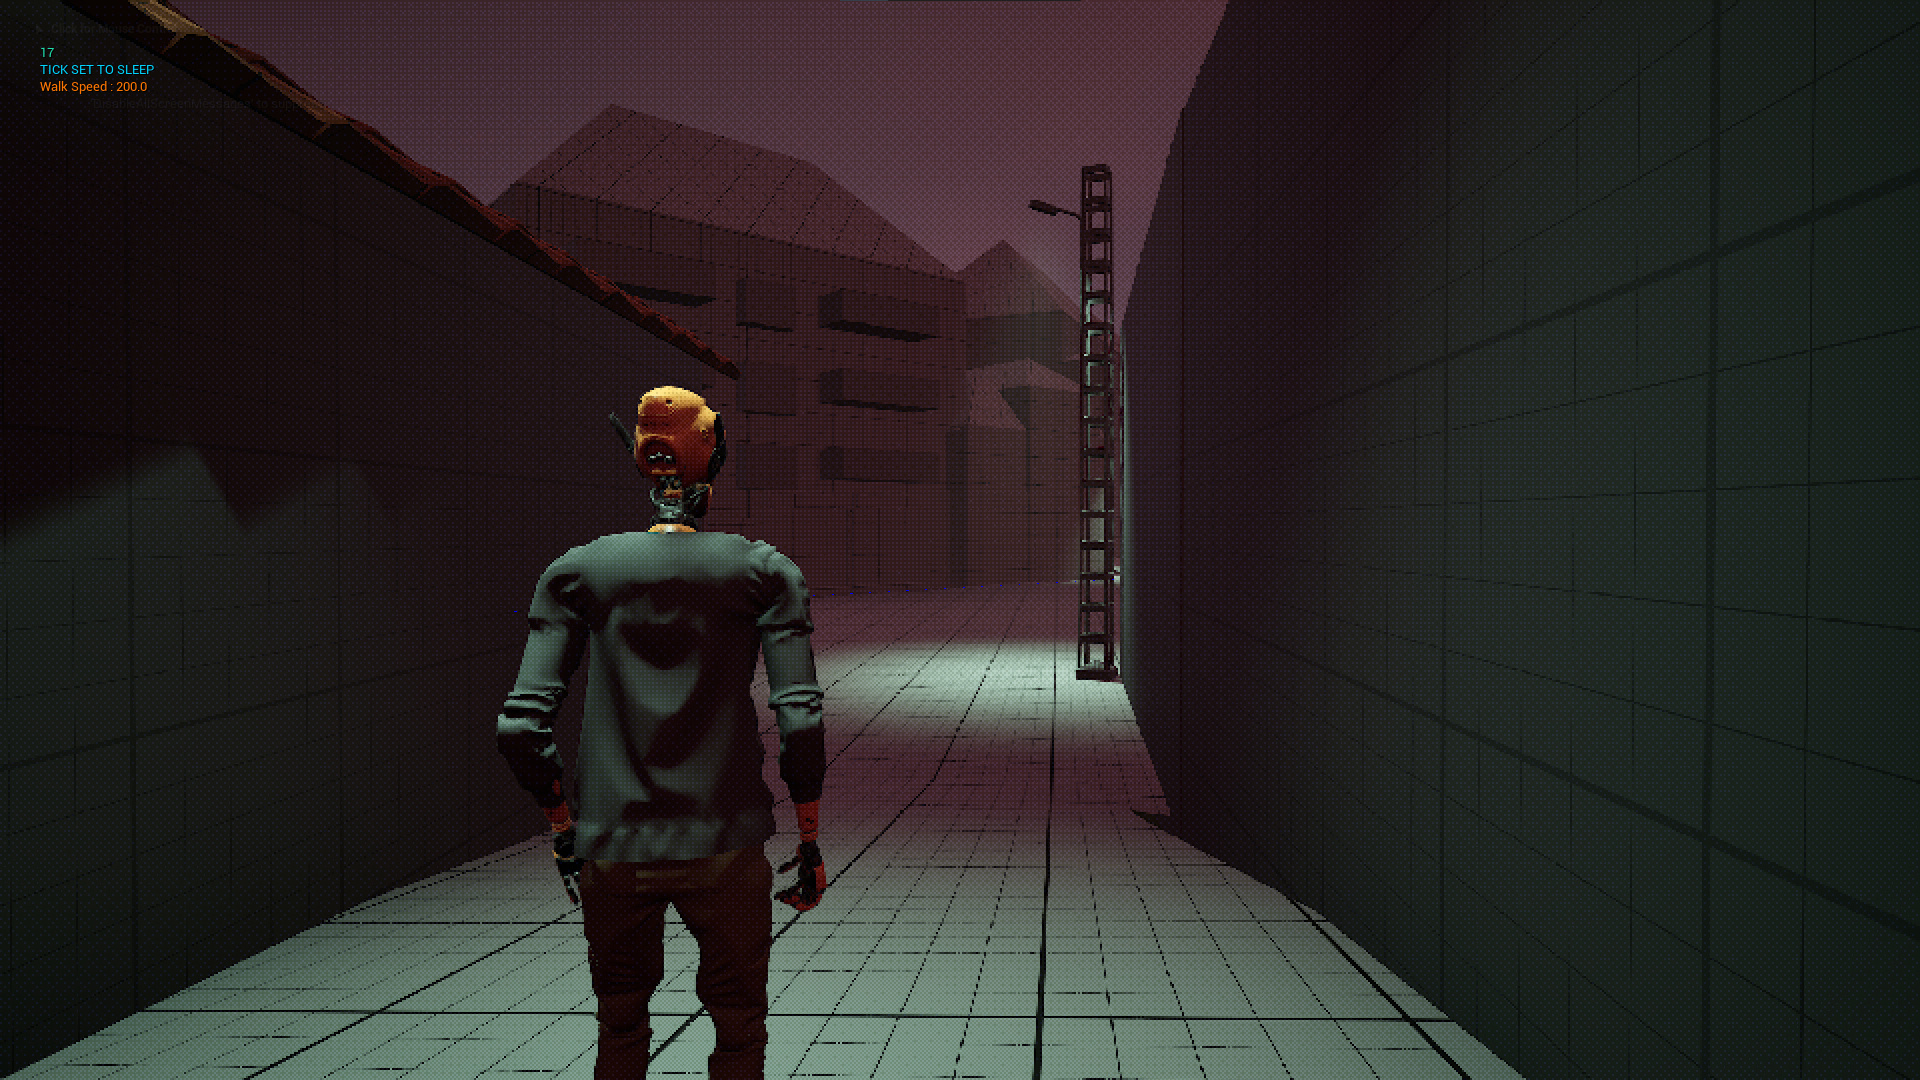
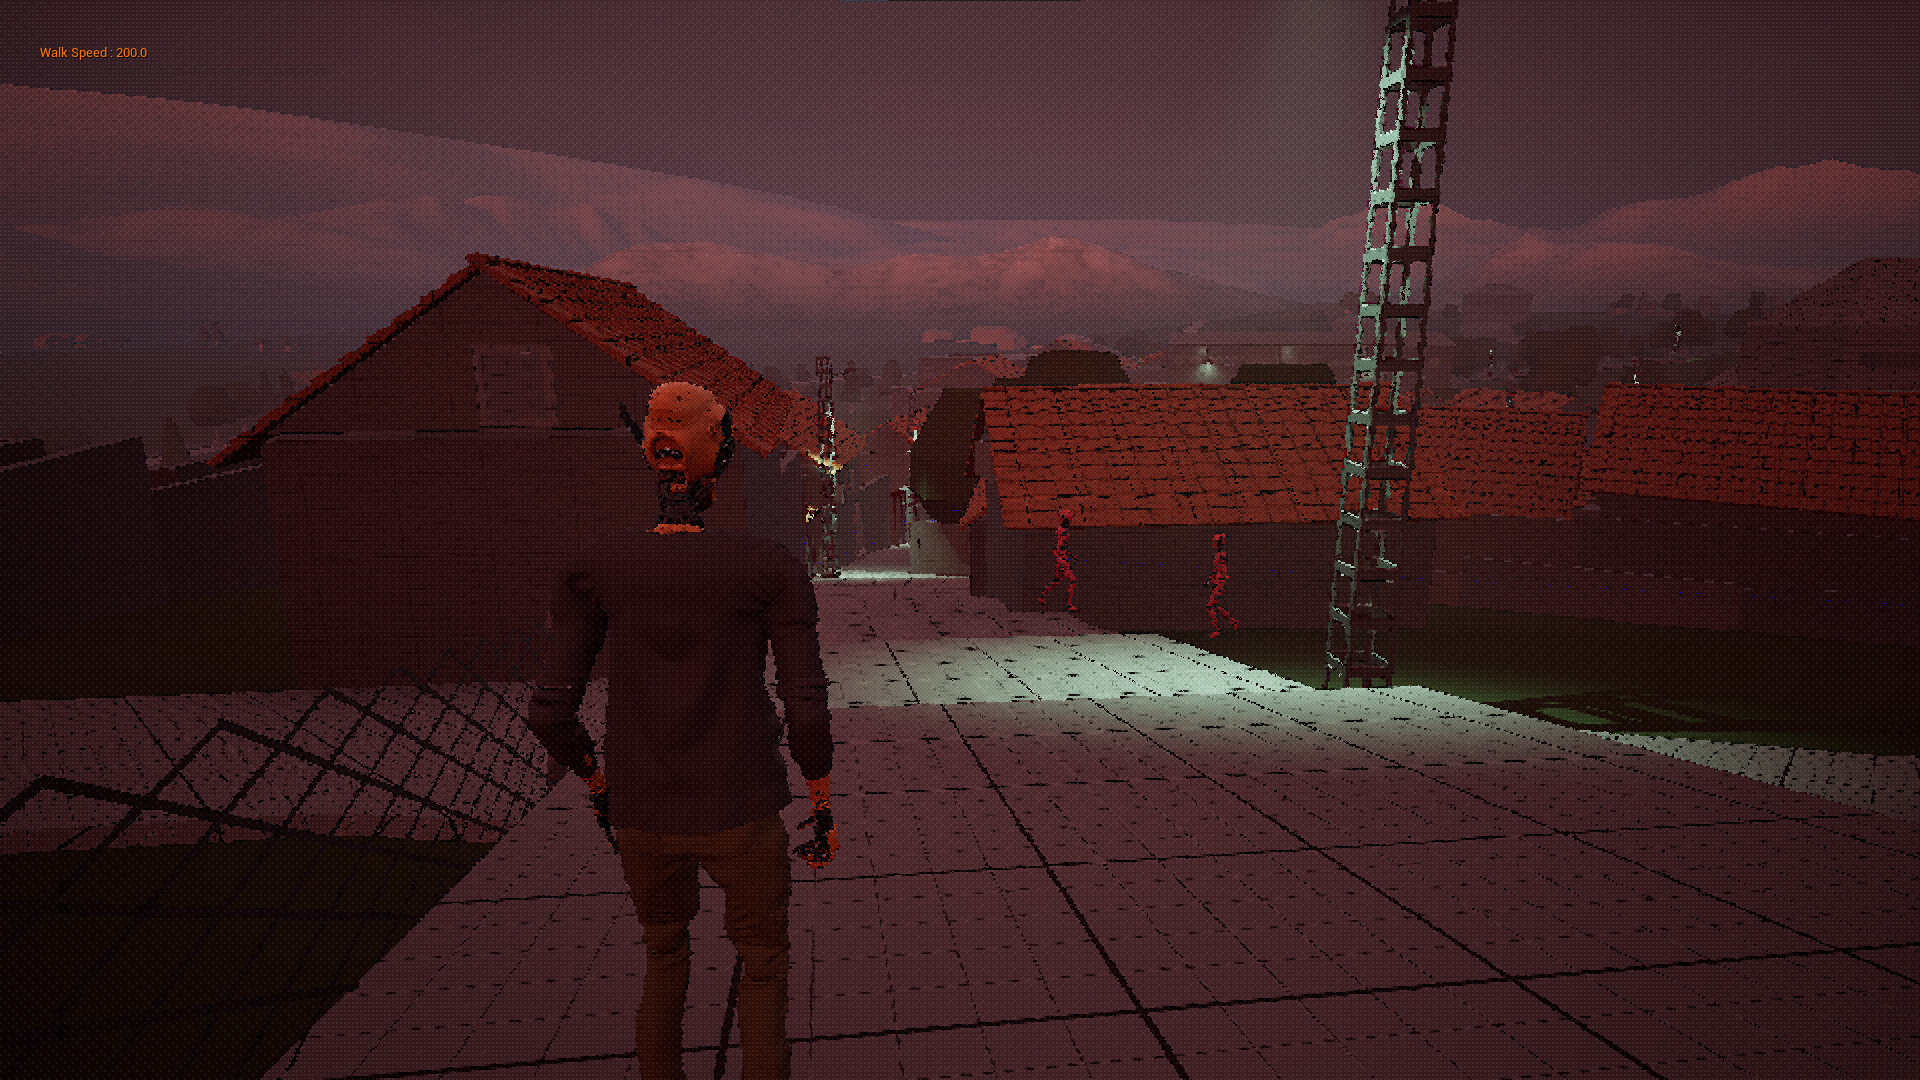
I had the idea to add some of the dream effects to the rest of the game. I tried it, but I didn’t like how it looked, so I created another one specifically for it. Here’s the end result.
I started with a 1-bit dithering effect first and then overlaid it on top of the render result. Here’s how the dithering effect looks on its own. If you zoom in you’ll notice it’s 1-bit (only black and white, no grayscale)
For anyone interested, here’s a breakdown :
I Started with a 32x1px gradient, then scaling it up with the “nearest neighbor” filtering to 1024x32px, to avoid smoothing the result.

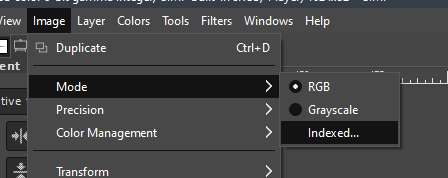
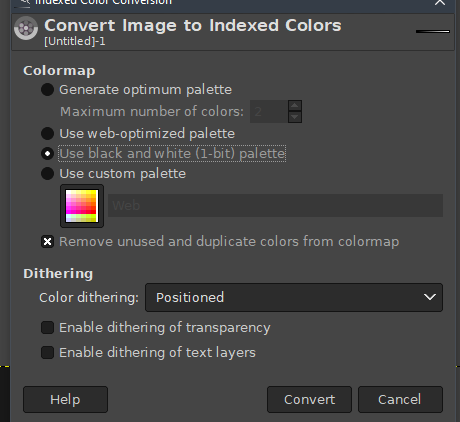
Next I opened it in GIMP and switched the color mode from “RGB” to “Indexed” then picked “Use black and white (1-bit) palette” and chose “Positioned” for the color dithering method. I’m not sure if Photoshop can do this, but I’m sure you can find online tools if you don’t have GIMP already installed.
This is the result. Please note the actual resolution is 1024×32 at this point, which is 32 squares of 32x32px. I manually fixed anything that didn’t look right, like obvious missing dots and such.

Next I cut these all into squares, set the mix mode to “additive” and the opacity to 2%, then stacked them all on top of each other. This is the result so far.
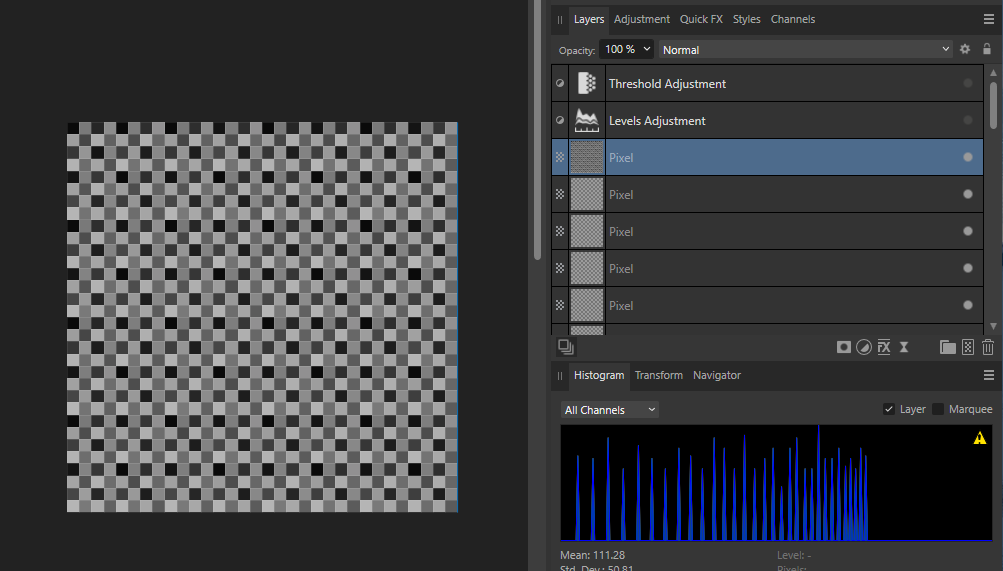
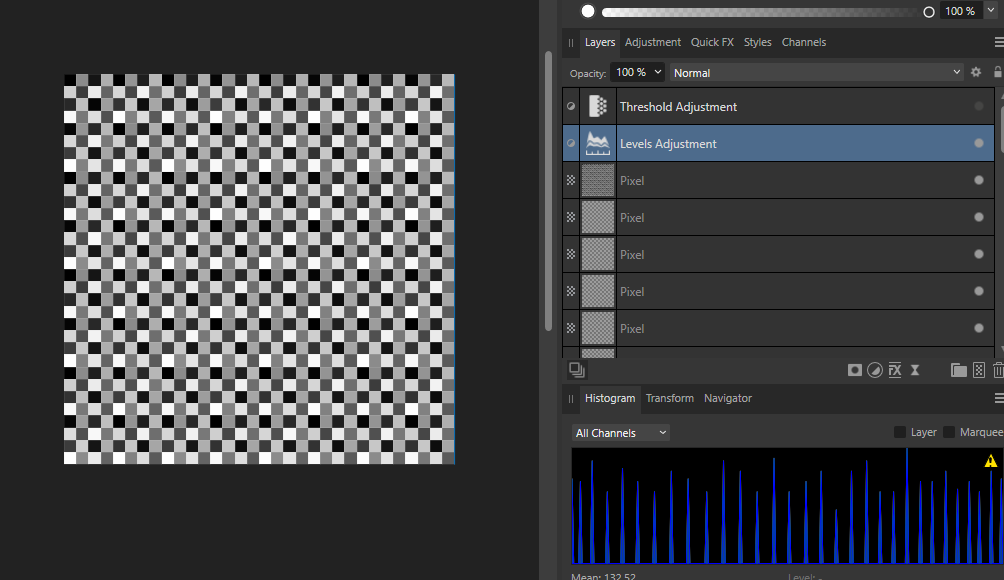
Notice that there are huge gaps in the histogram at the beginning and end, which means it’s not covering all the black and white range (there are no pure whites or pure blacks). This is where the levels adjustment comes in. I also adjusted the gamma a little bit to make the values (peaks) as evenly spaced as possible, because they were a bit skewed toward the the whites.
Make sure to use 16-bit color depth to reduce precision errors.
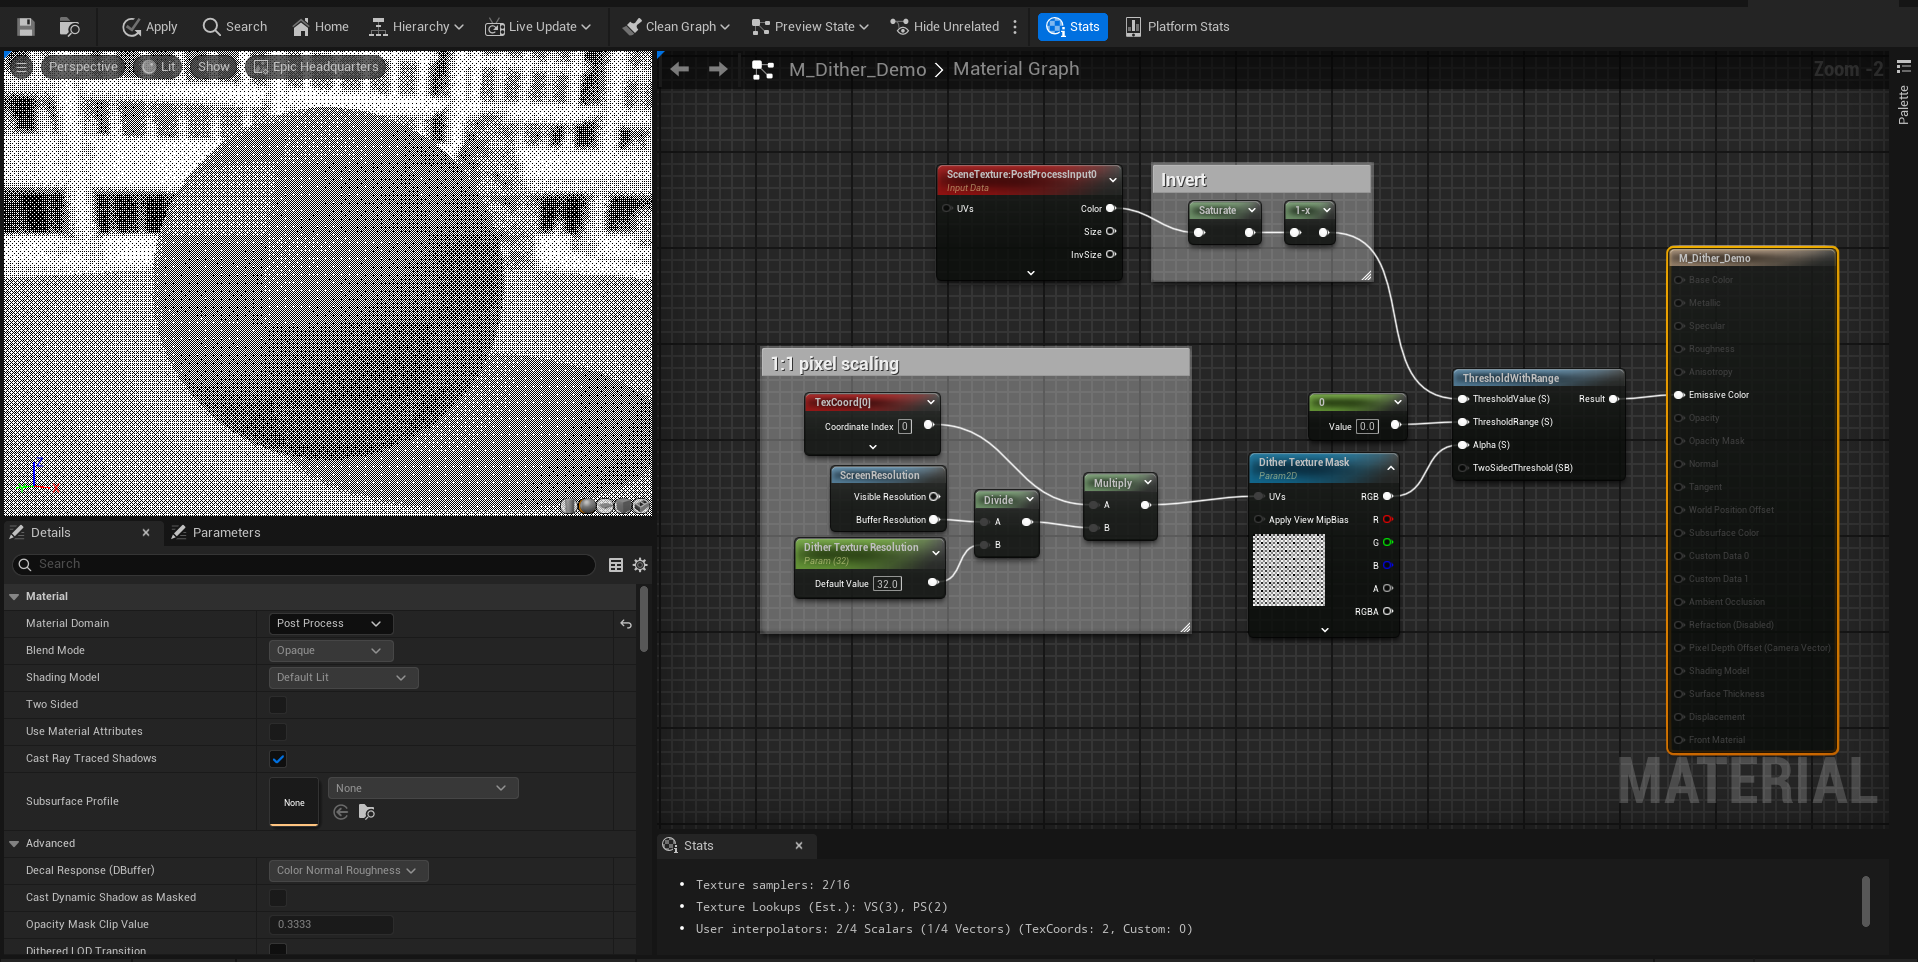
That’s all I need. I have a dithered gradient mask. The values go progressively from dark to bright in a dithered manner, and when combined with a threshold filter the pattern will reveal itself.
In this case the threshold value is applied uniformly, but it can be variable in the game. So the idea is to overlay the dither mask texture over the entire screen, then use the rendered image to control the threshold value. Fortunately this is very simple to achieve in Unreal, all you have to do is use the following post-process material (Click to expand). I assume this is also simple in Unity and Godot as well, as long as you understand the logic.

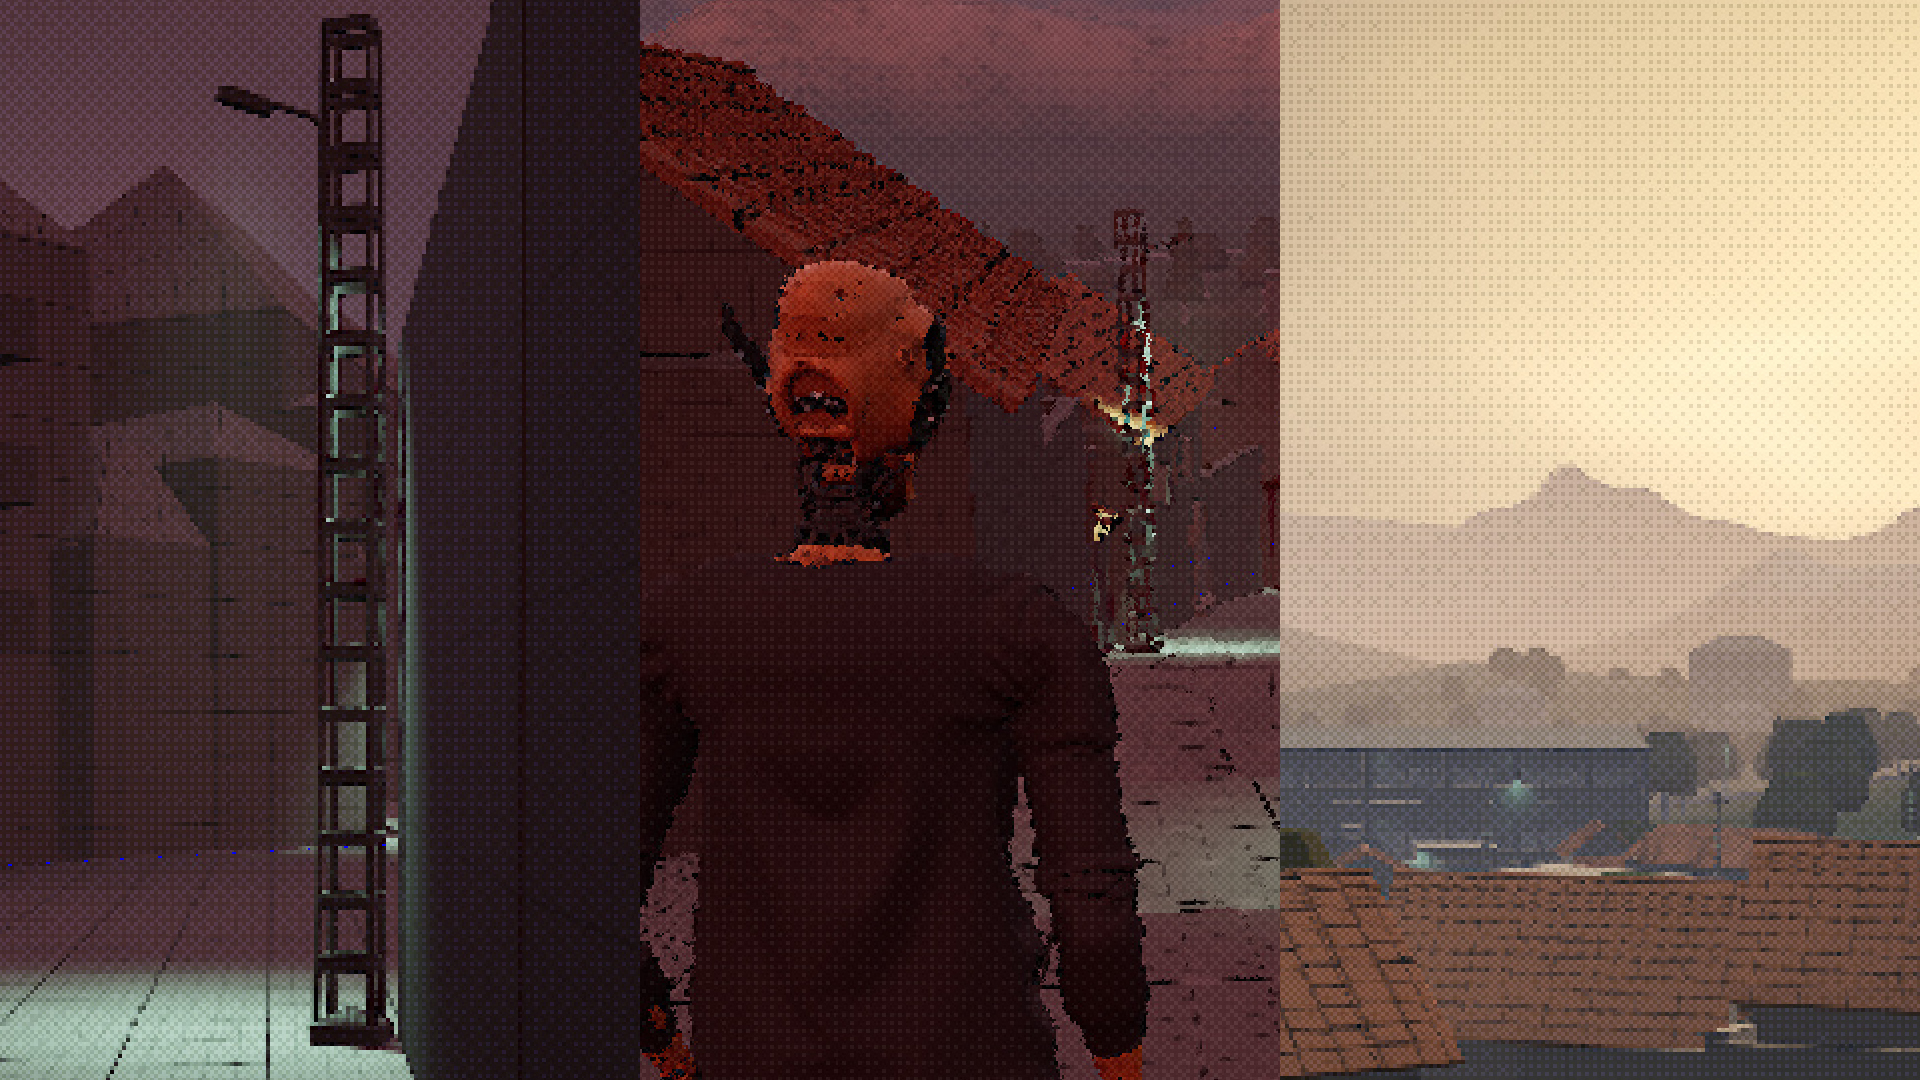
And here’s a gameplay recording with it. I rendered it at half resolution because the video compression will kill it otherwise
The hard part is done. All I did after that was pixelate the render to 1/2 resolution and add the effect on top at low intensity. It’s subtle enough to not appear in medium-quality videos due to compression, so have some screenshots instead. Make sure to zoom it to view all the details.

I’ll investigate later how I can reduce render resolution reliably to increase performance. For now it’s rendering at 75% resolution with TSR upscaling, then pixelated with a post process filter. That’s the only way it remains sharp and pixelated with the proper dithering effect, but I’d like to actually render it natively pixelated at 50% resolution without blurring the result.
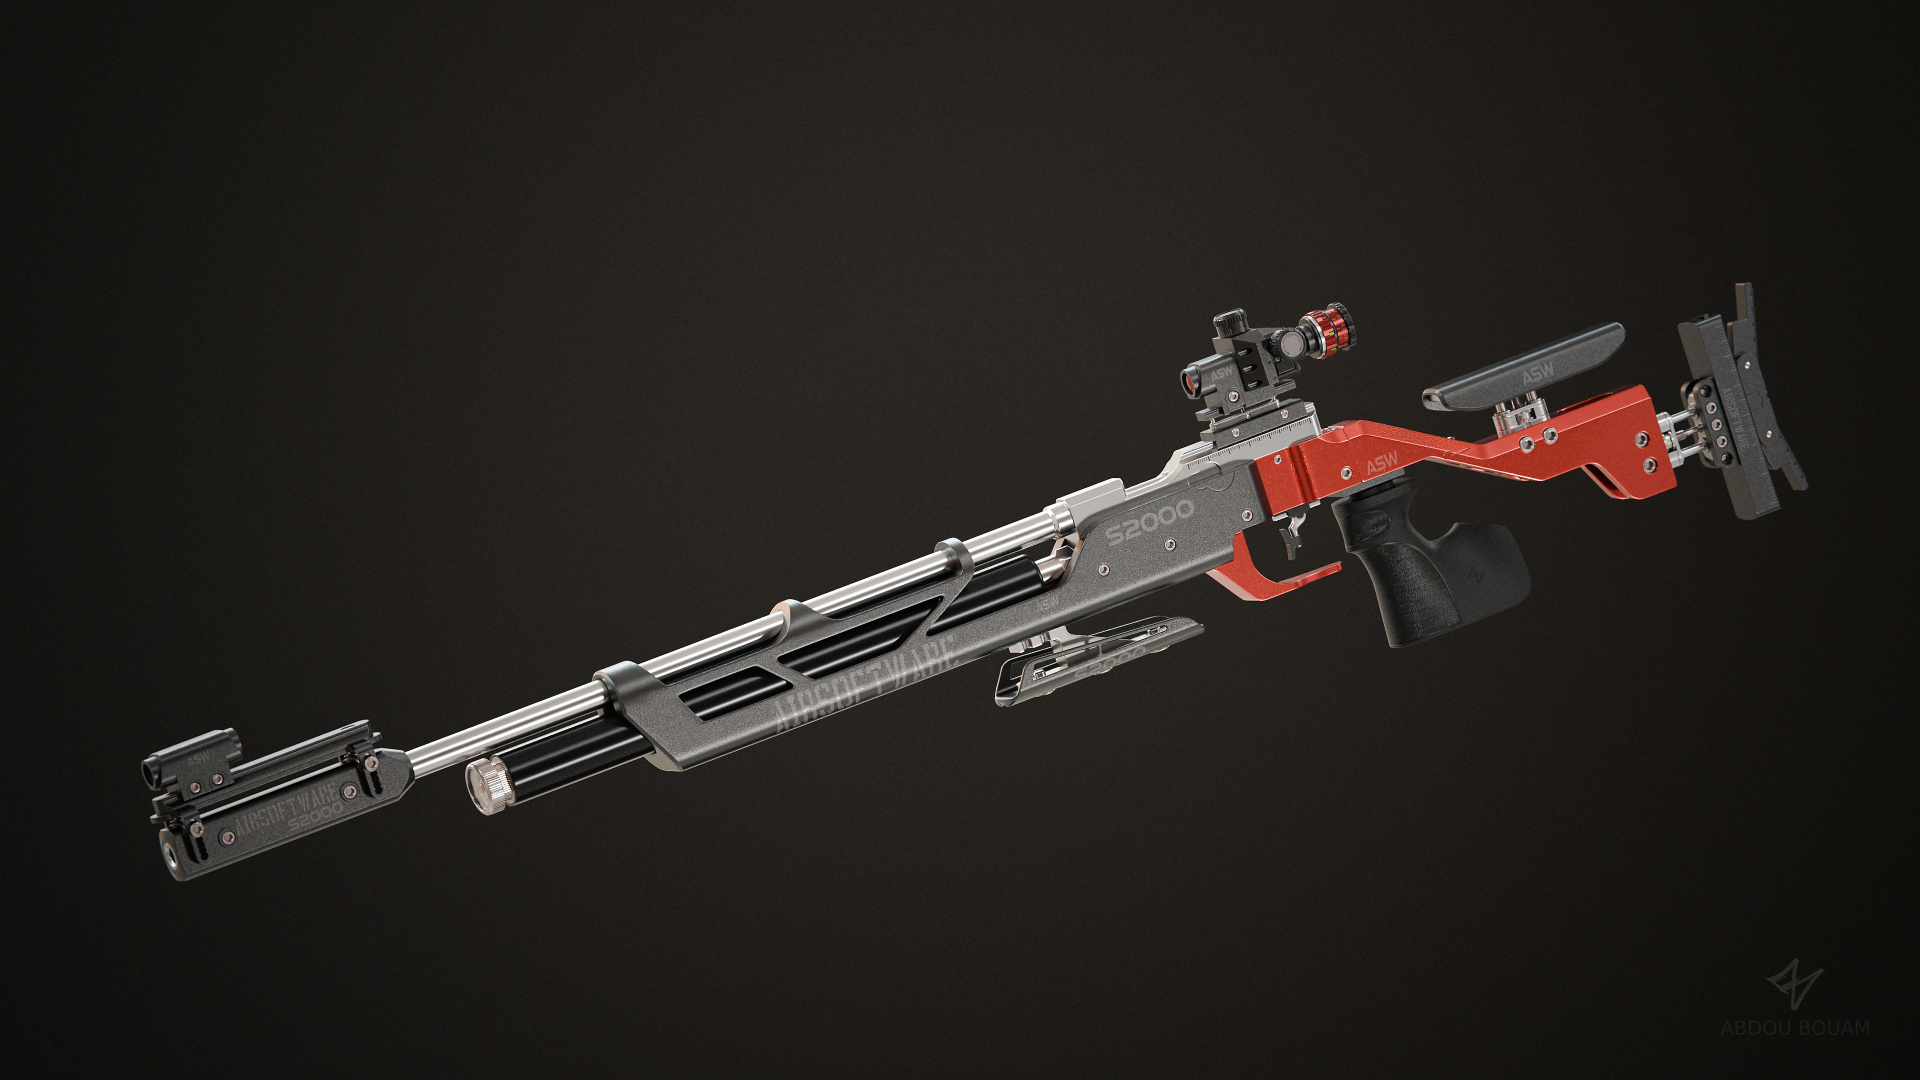
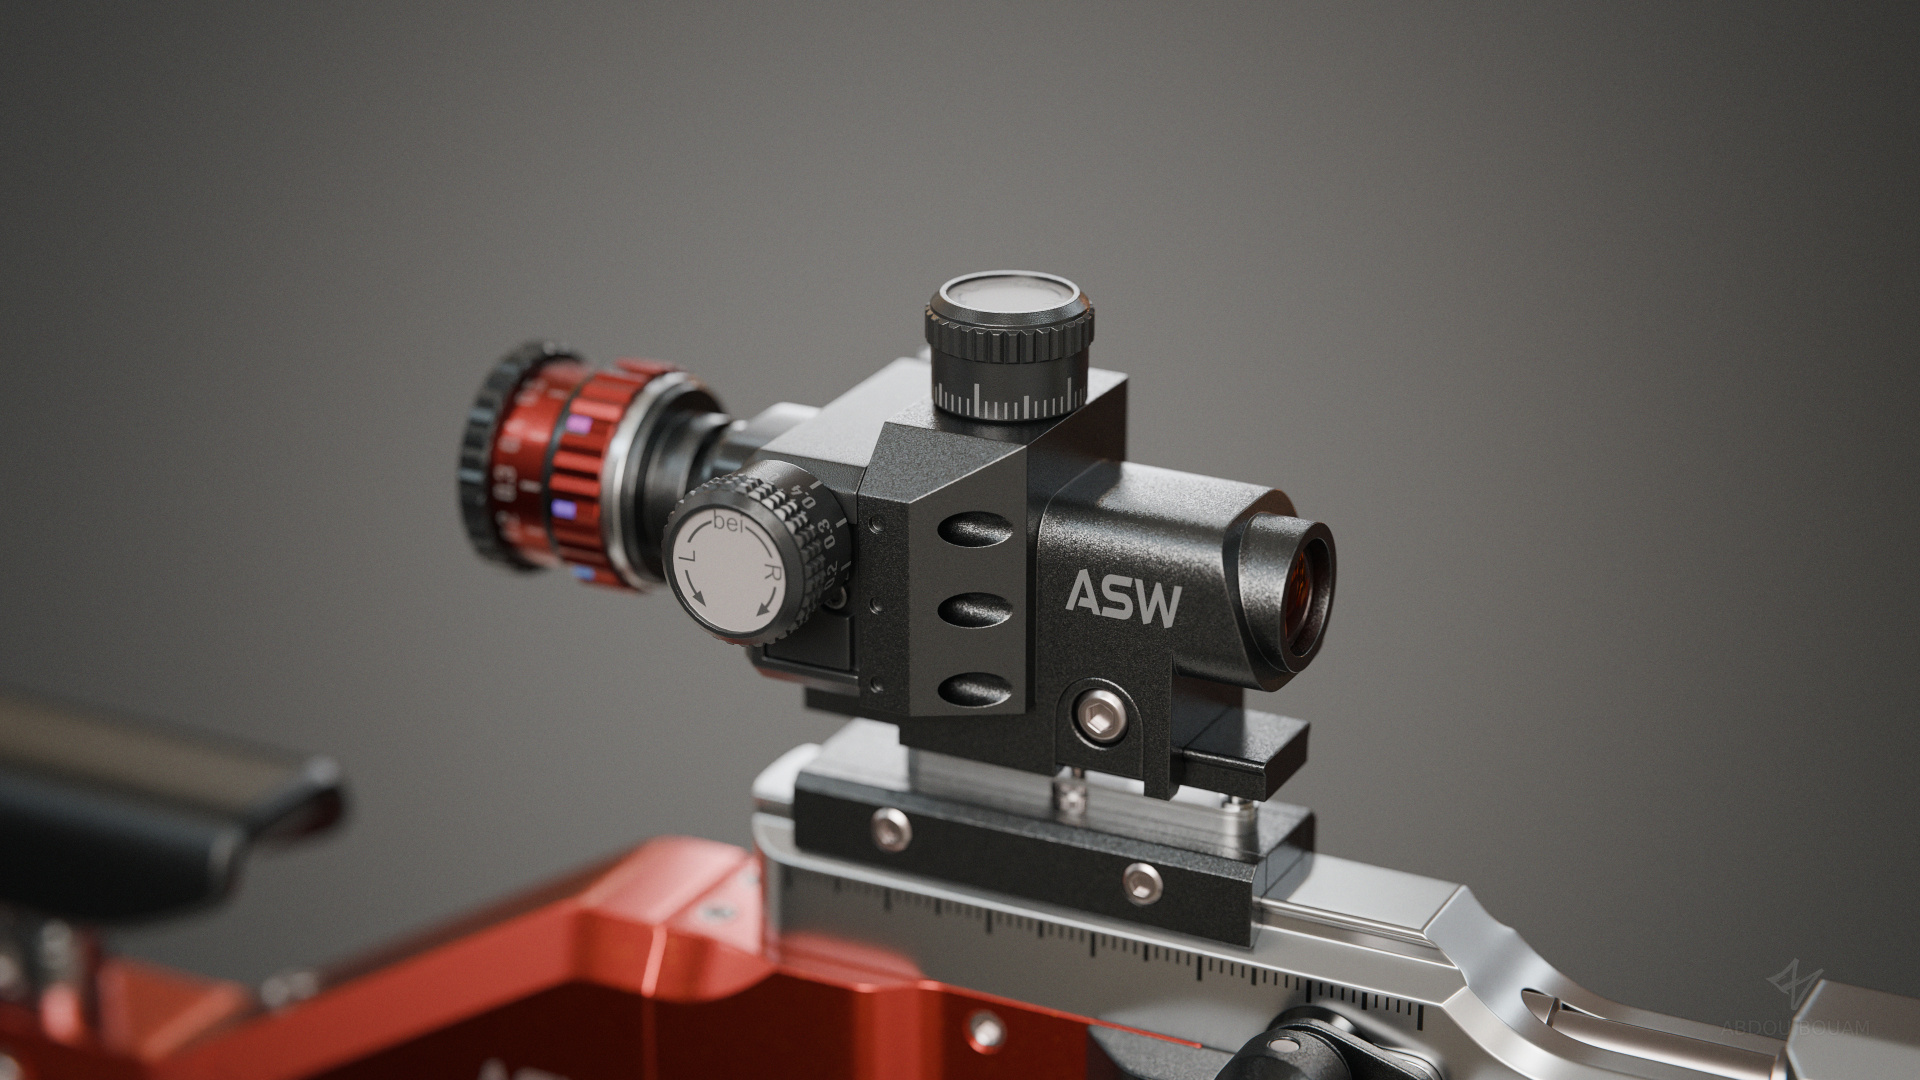
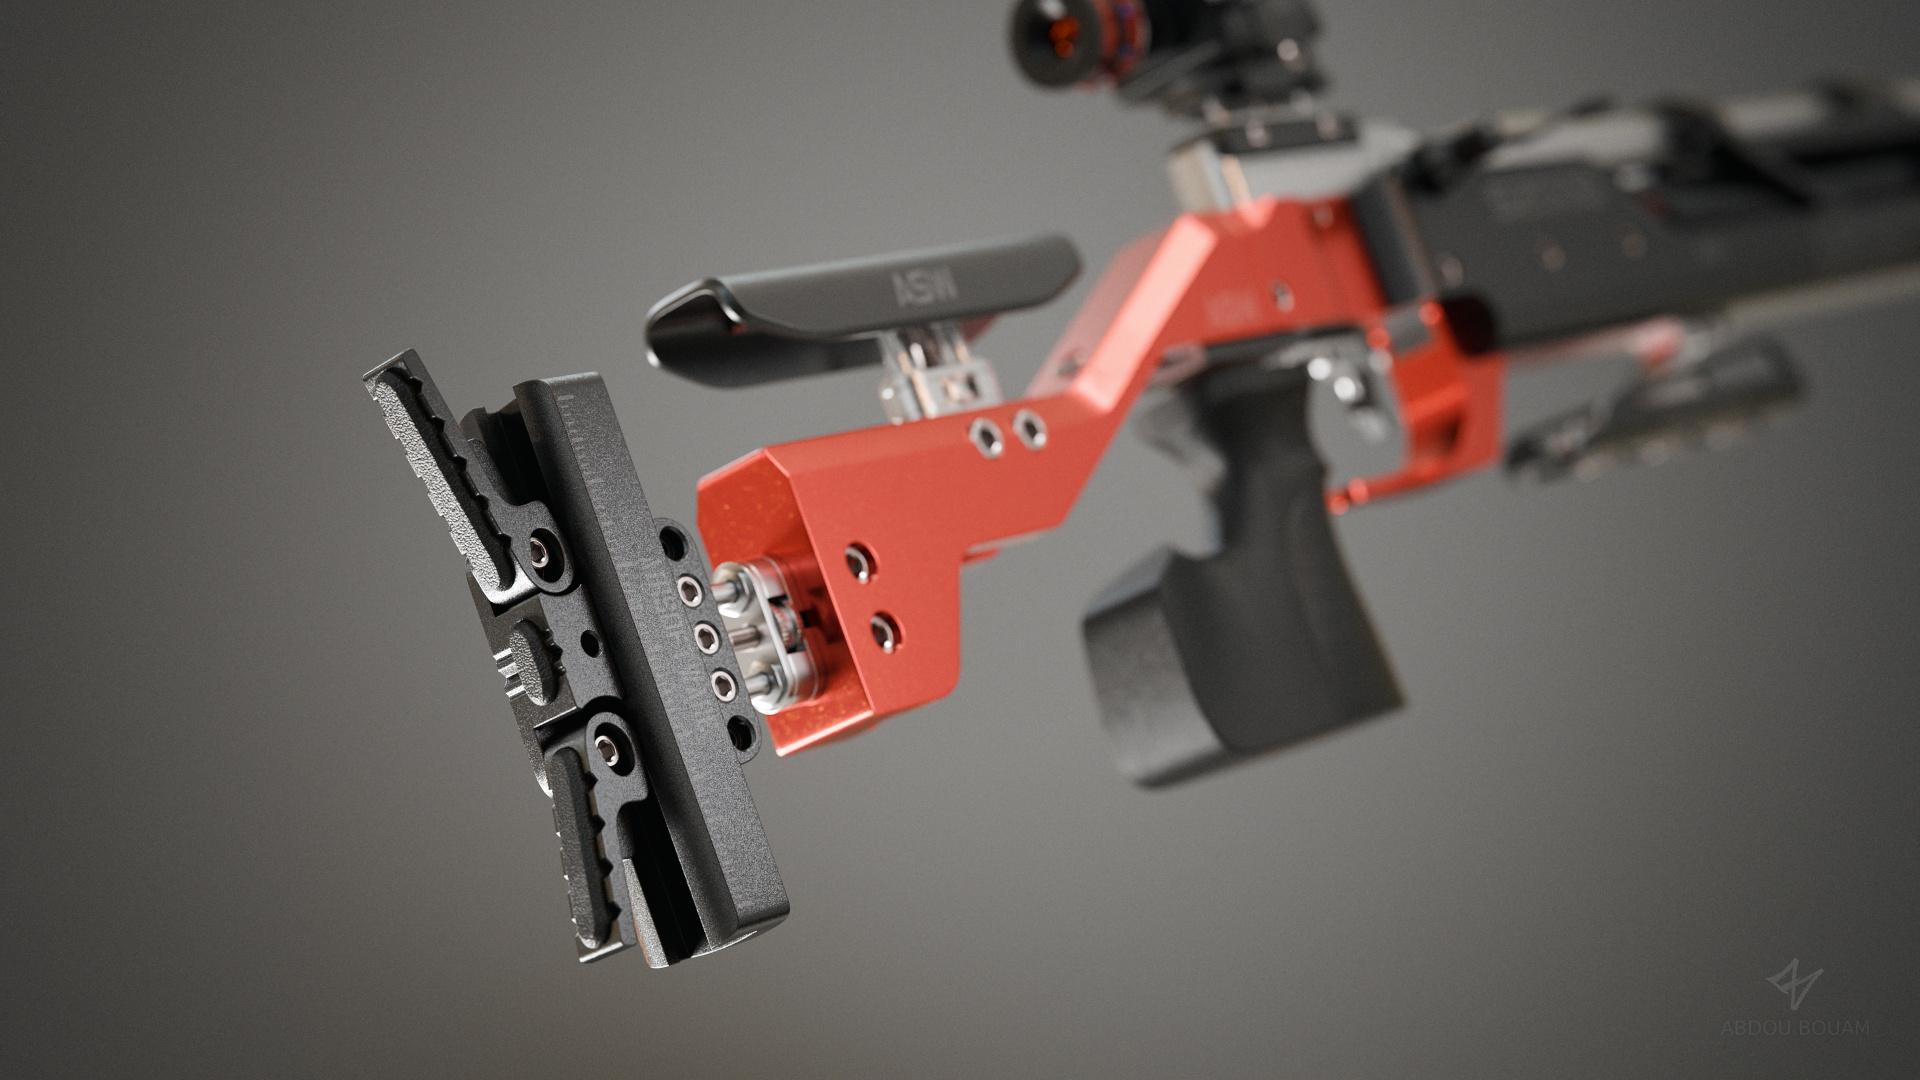
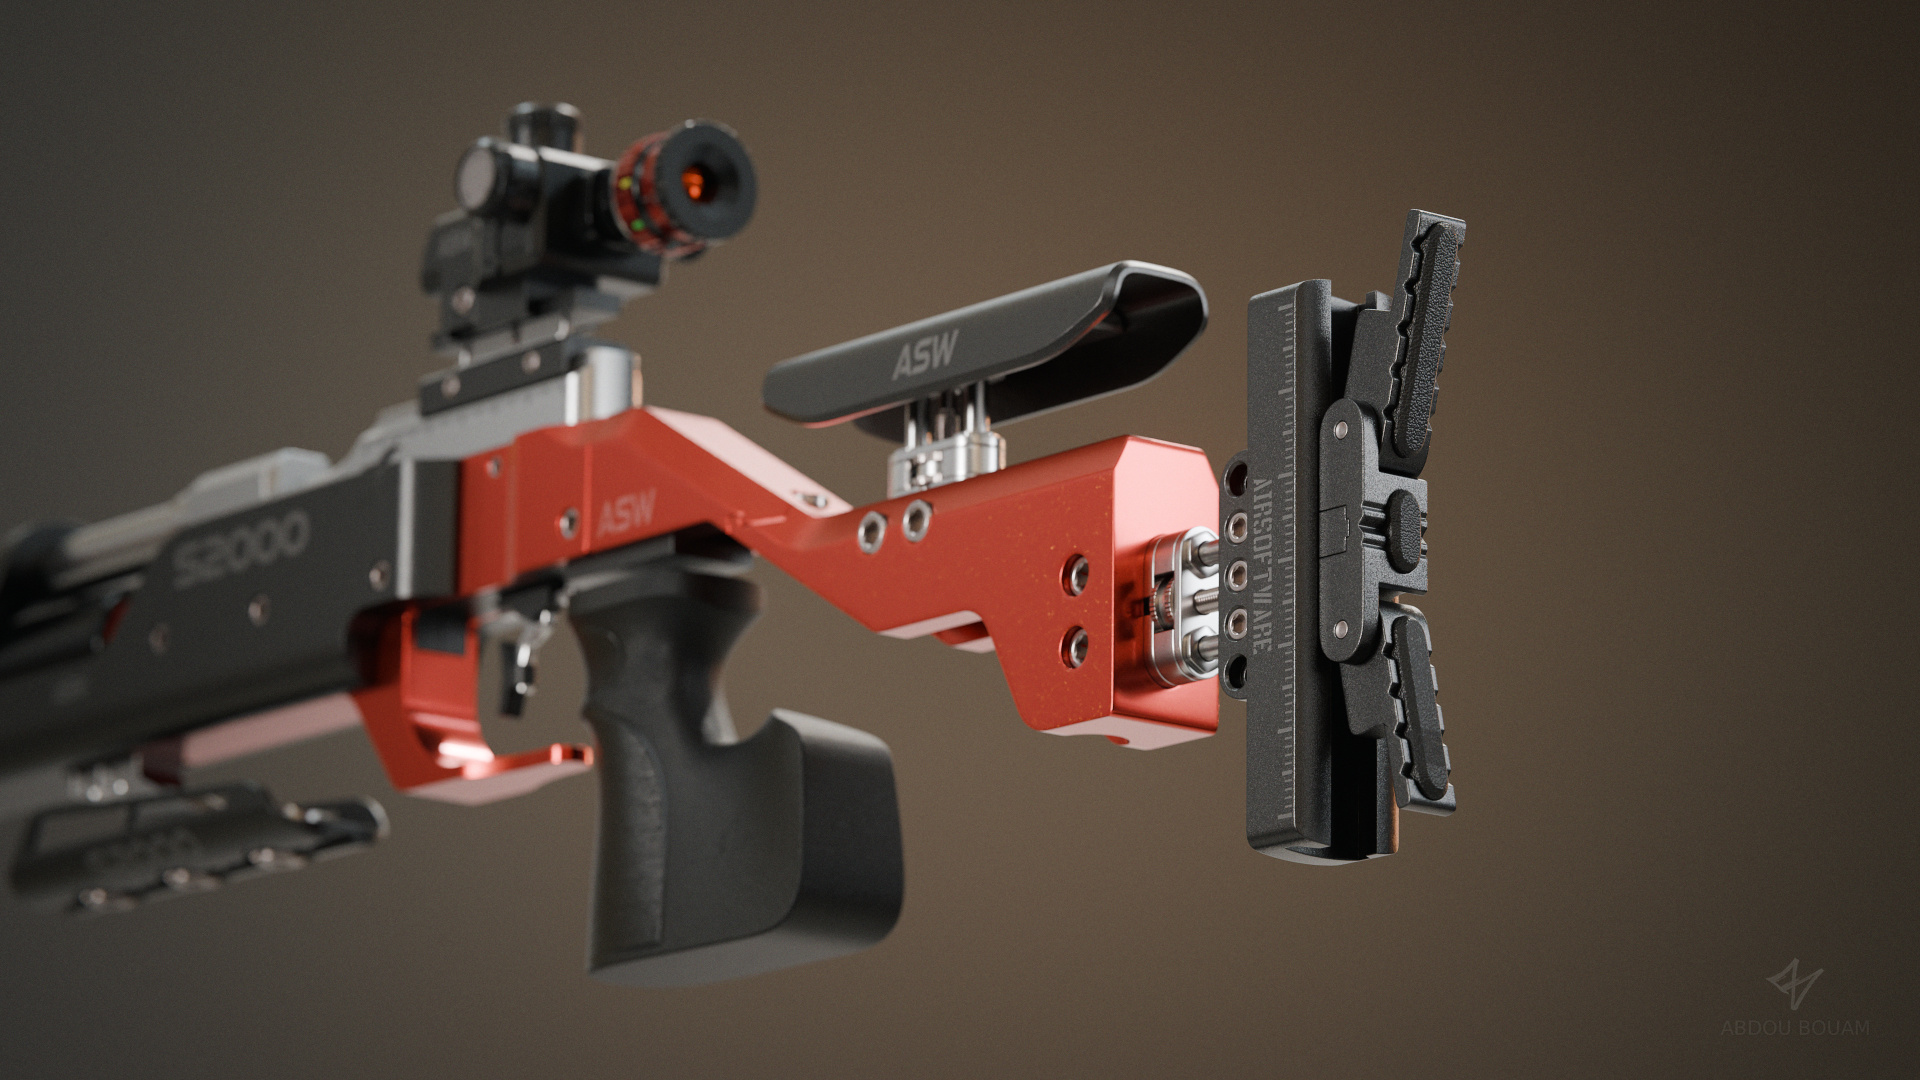
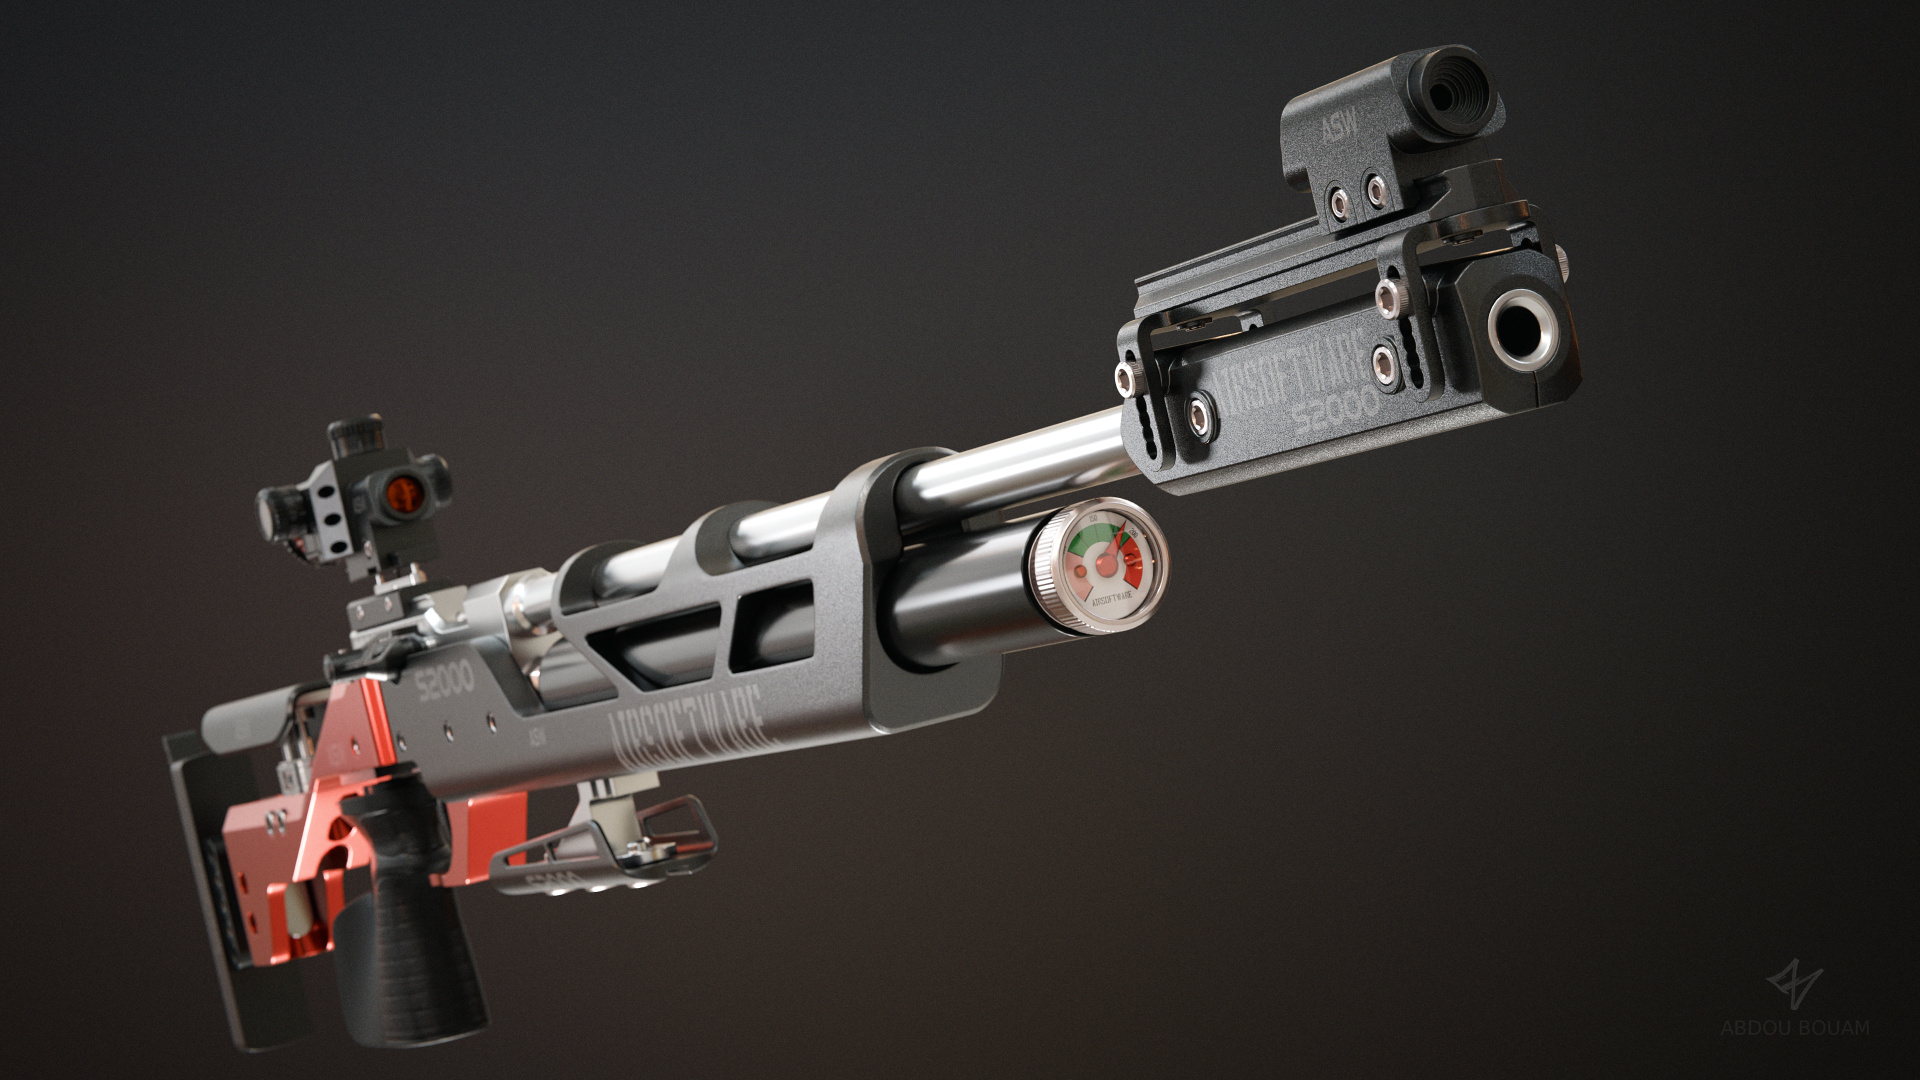
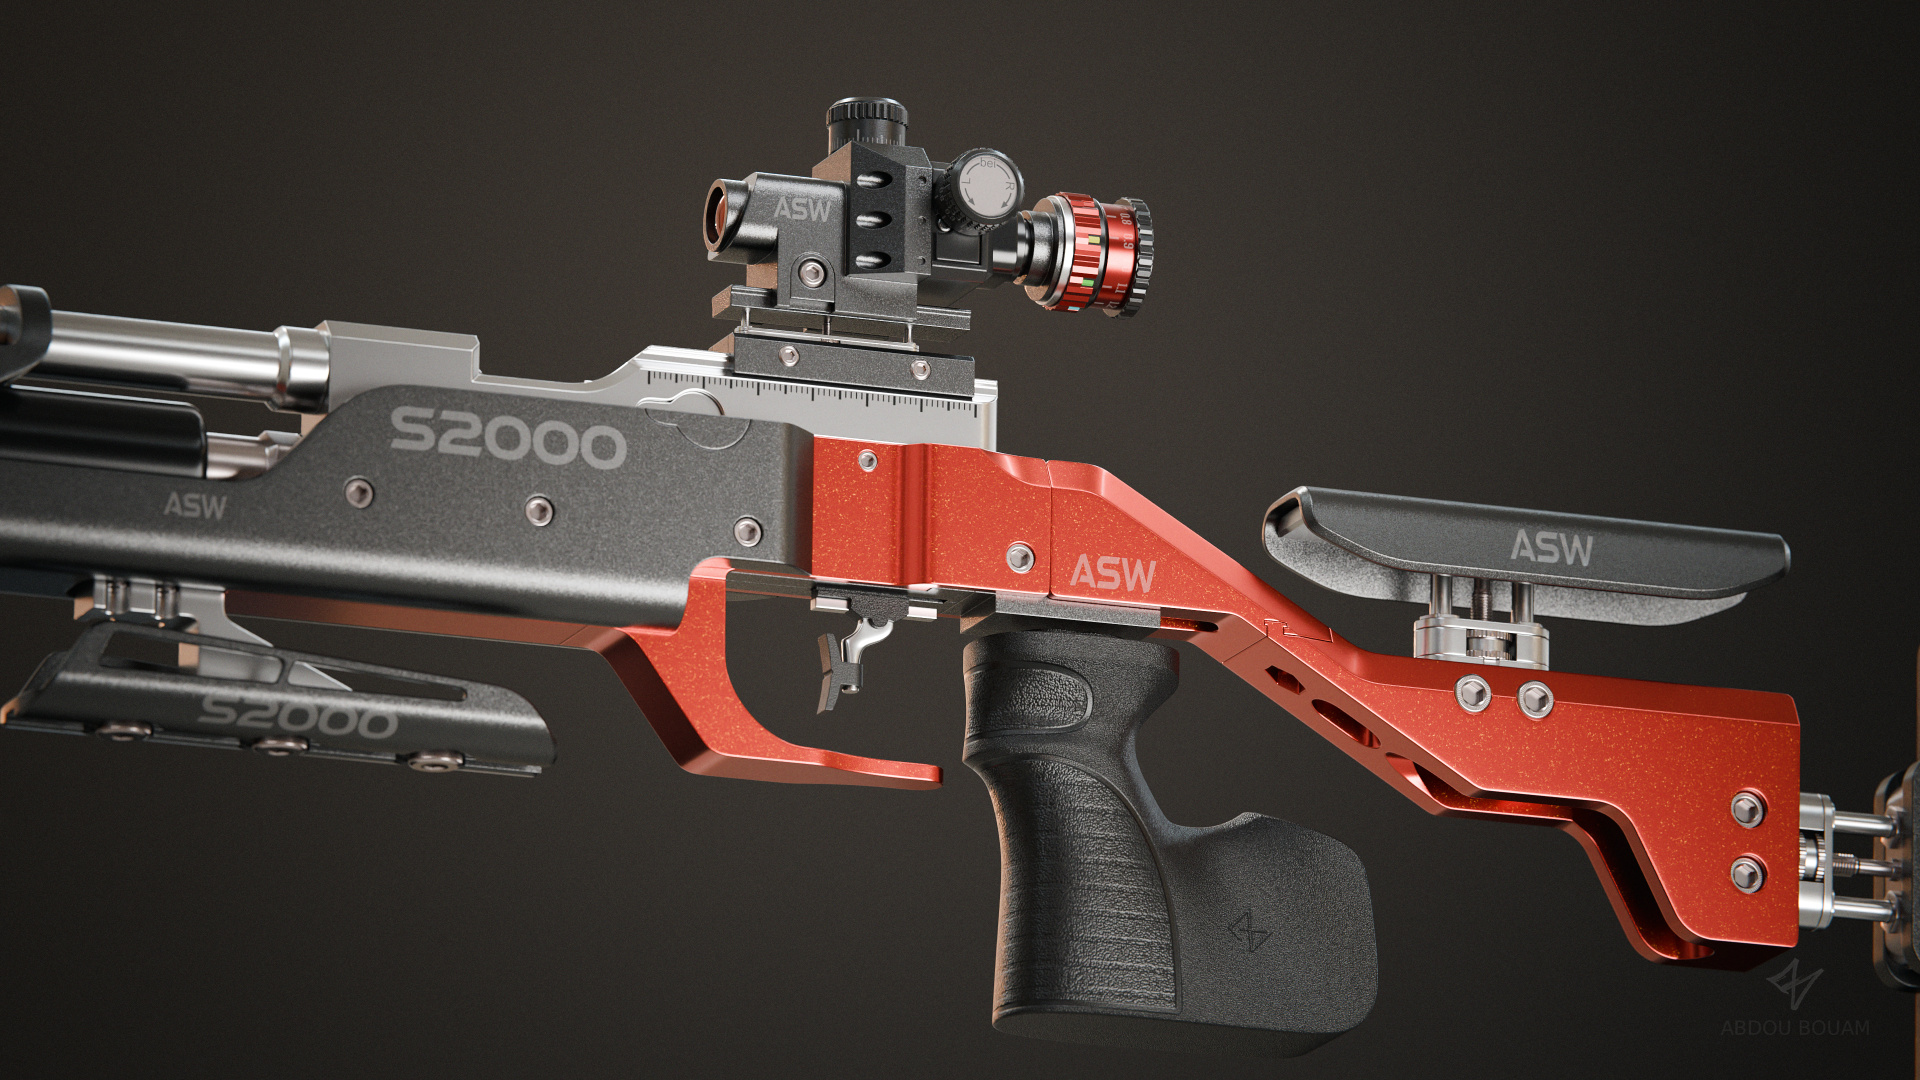
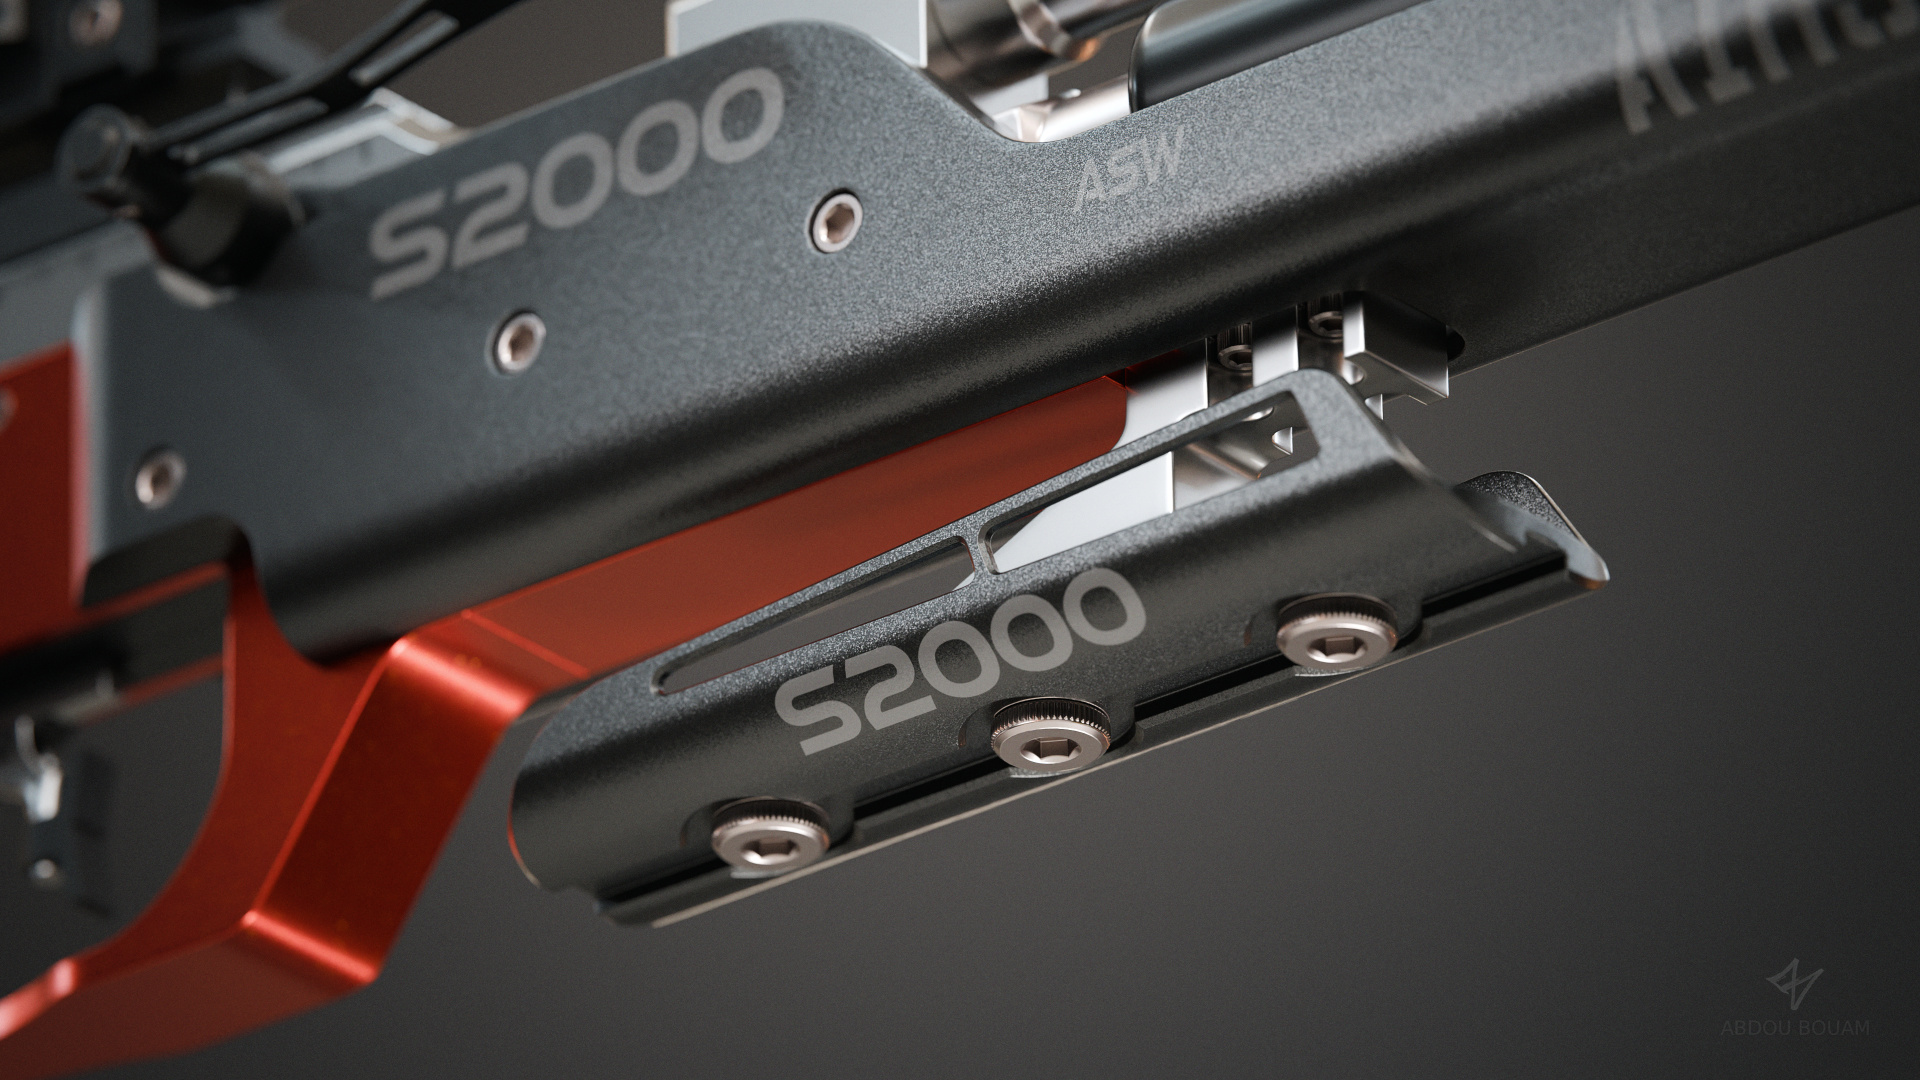
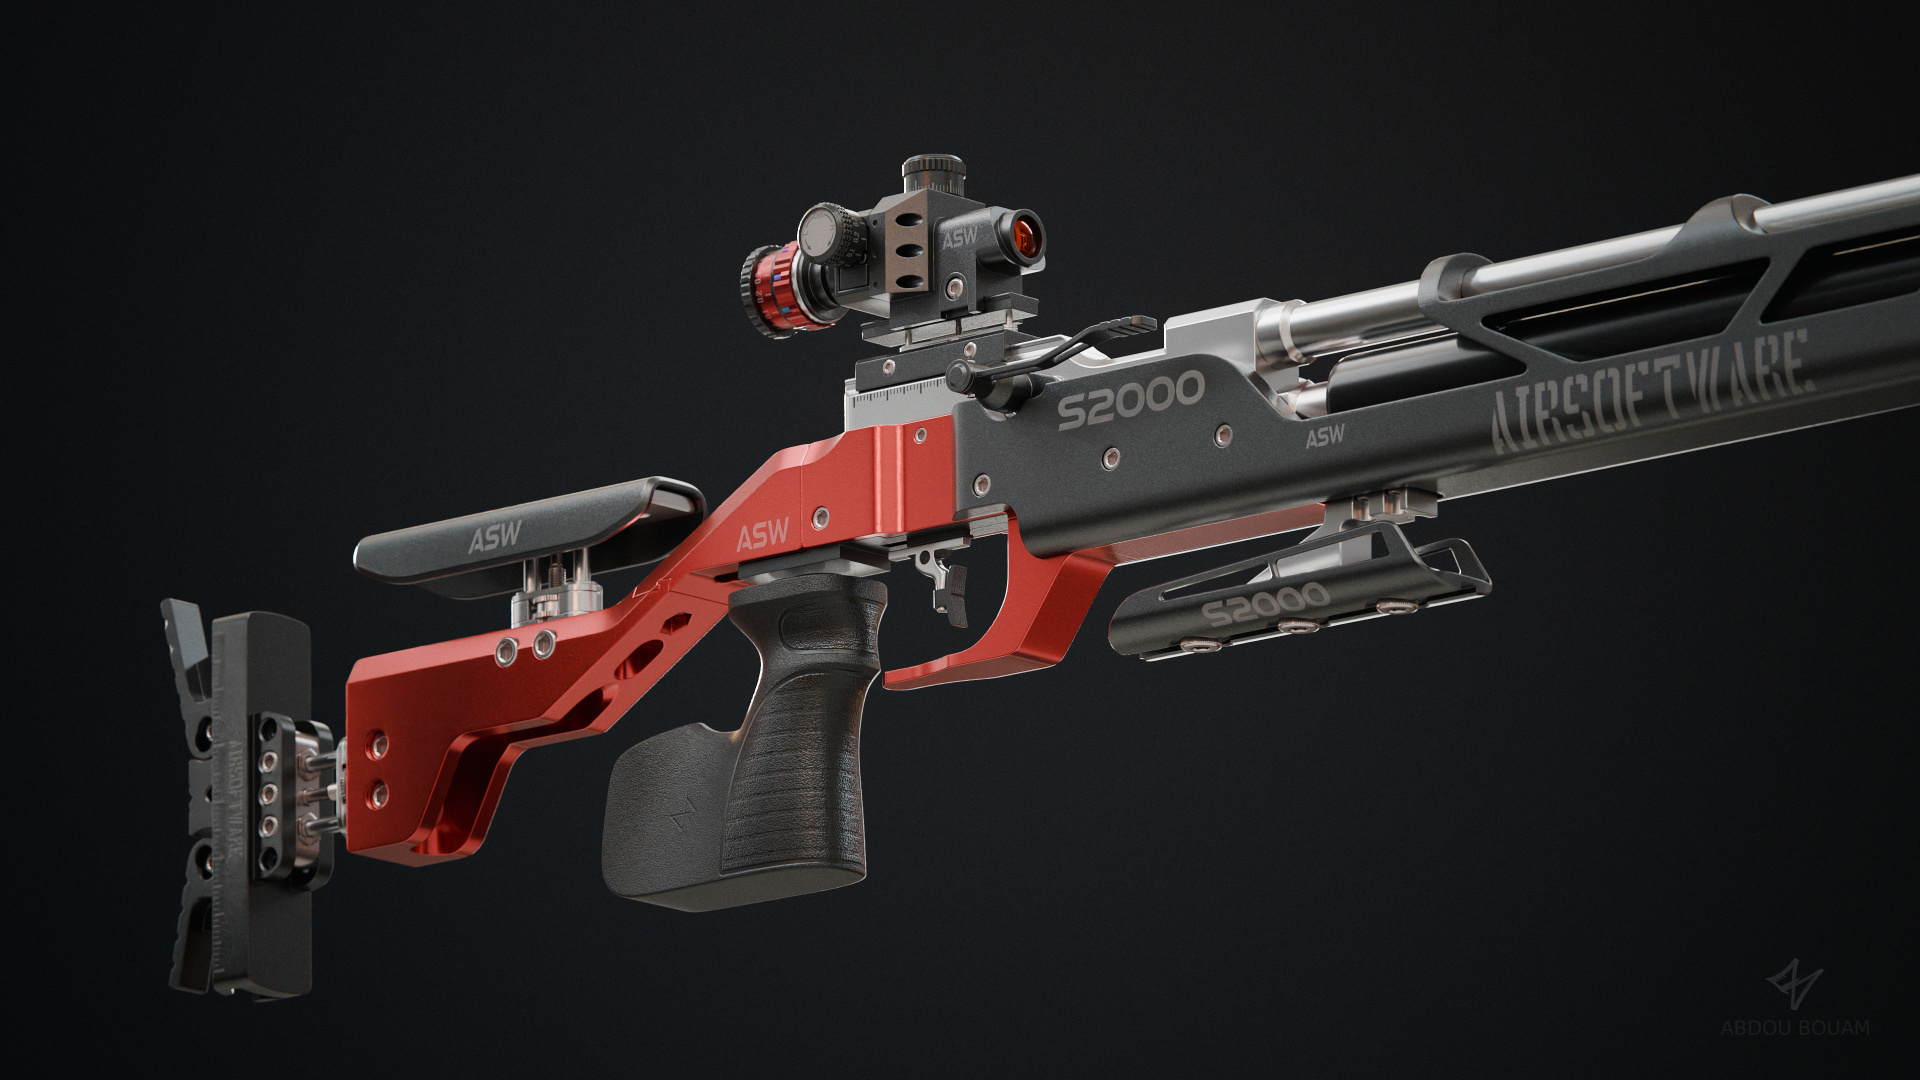
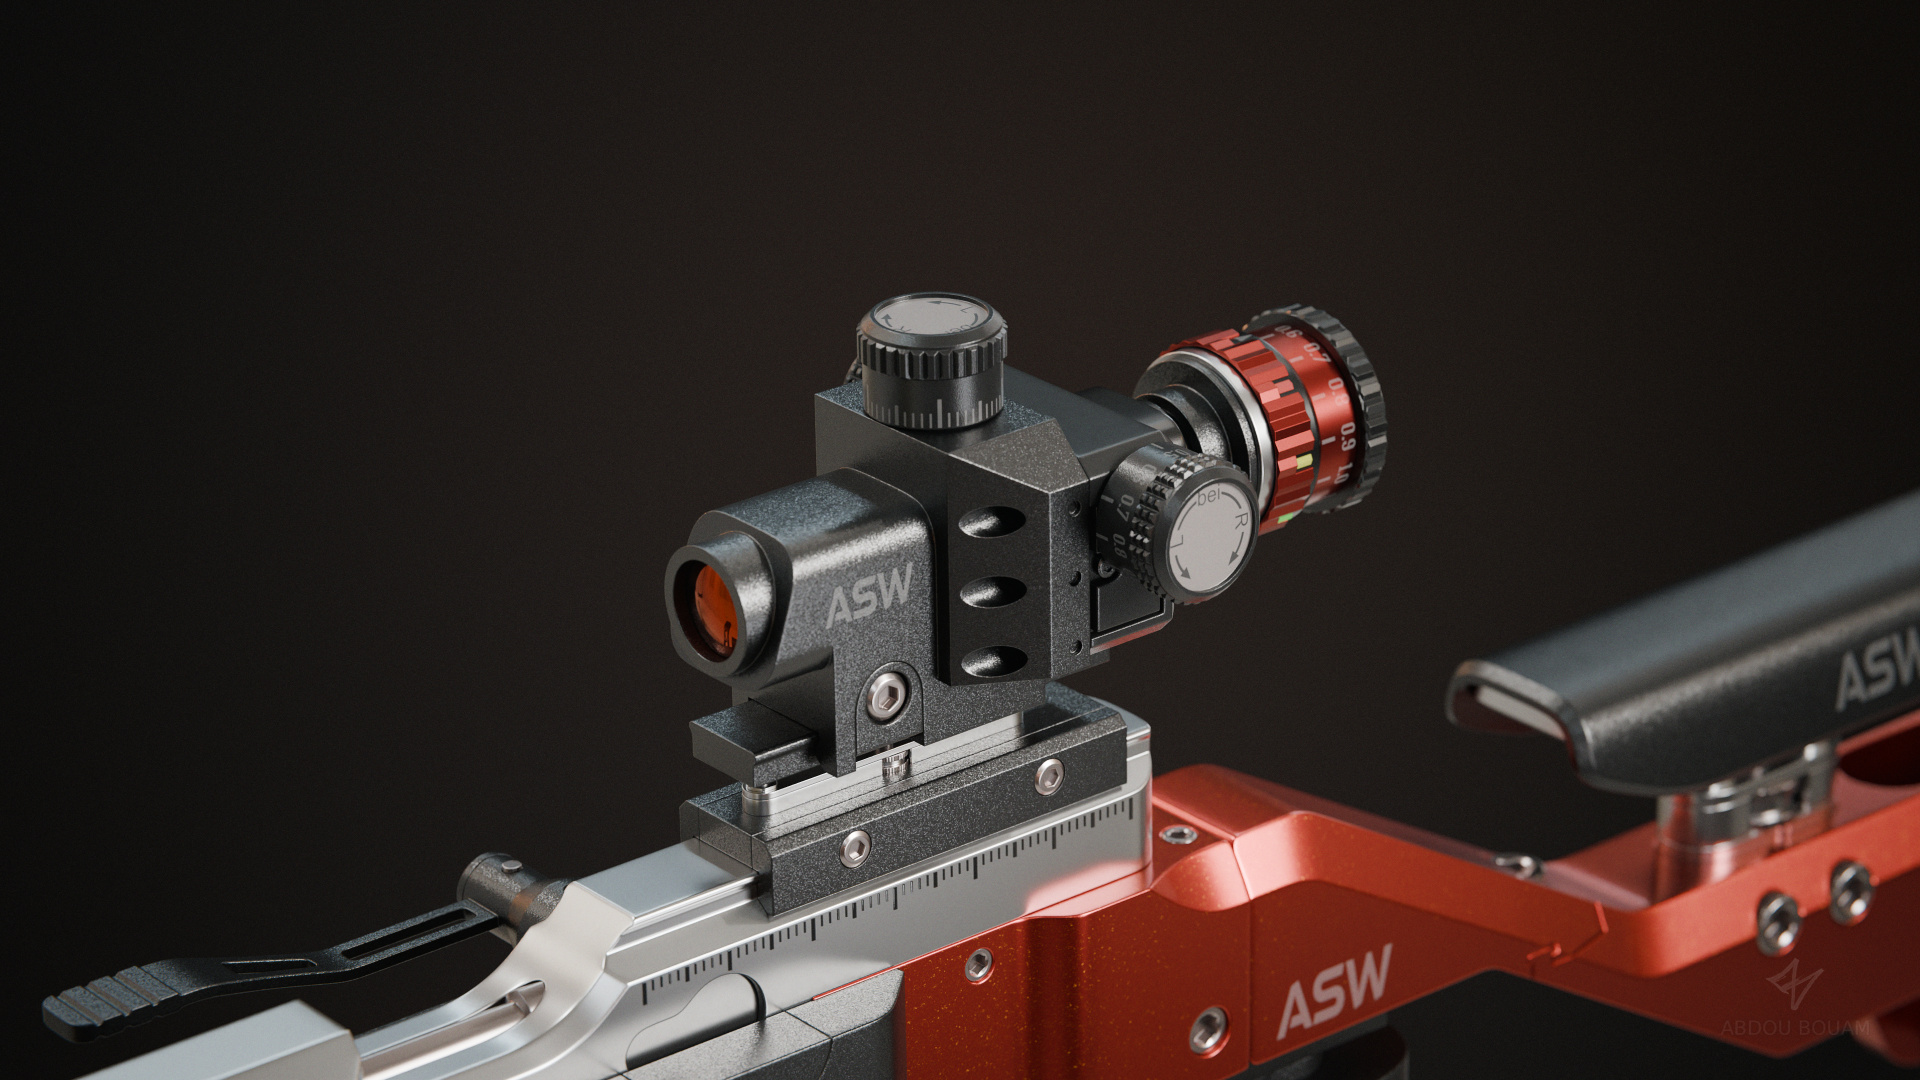
Airsoft Rifle
This is what took most of my week. I treated this model as a product visualization, so I included beauty shots, animations, and even an assembly video. I didn’t bother with a lowpoly model, but the higher quality geometry and internals made up for any time I could have saved and then some.
Visit the ArtStation post for higher quality renders : https://www.artstation.com/artwork/qJNqry

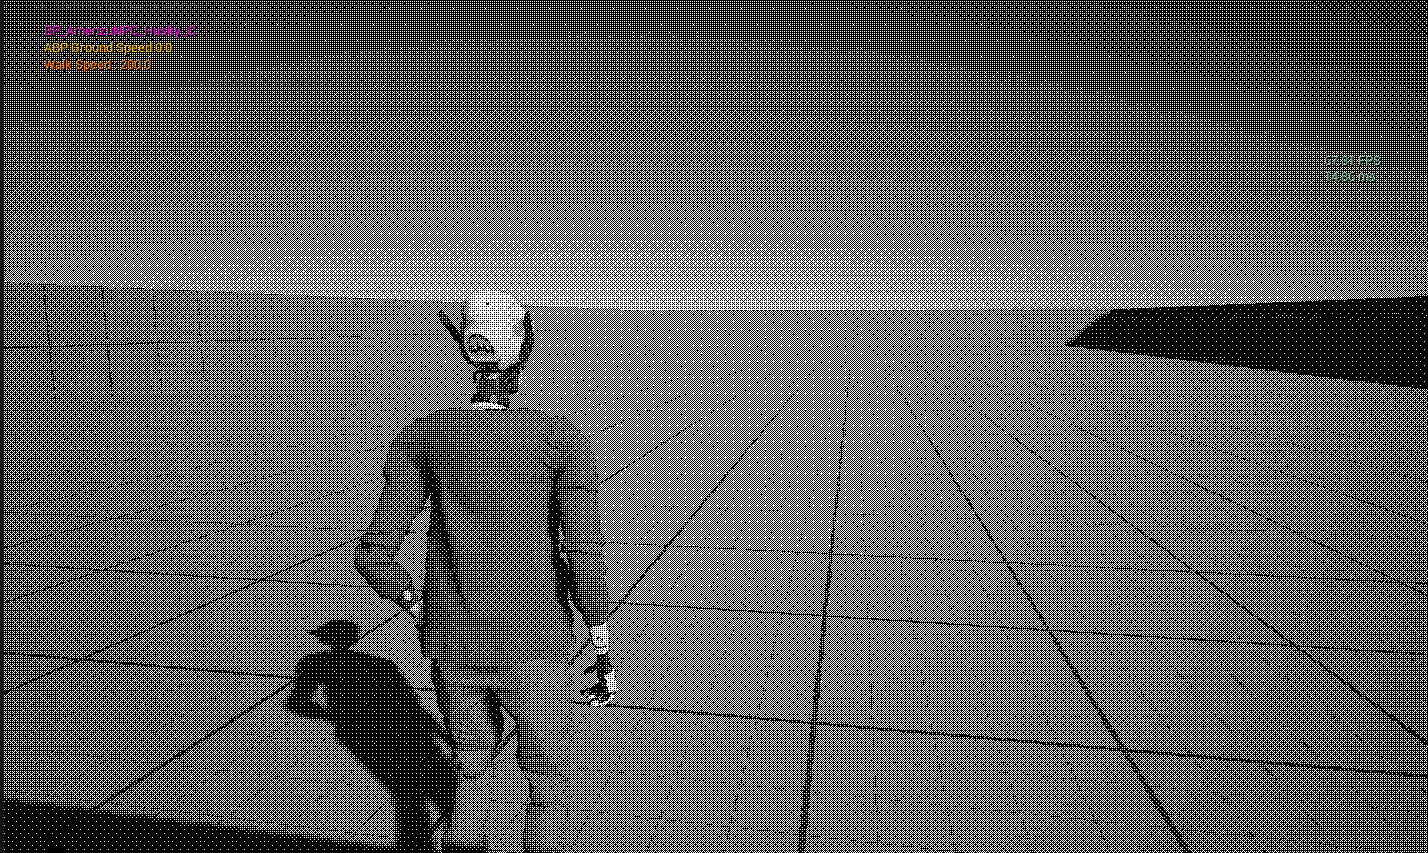
HuskyDrift
I added physics to the game and changed the way it worked. There are now collisions and it reacts with the world.
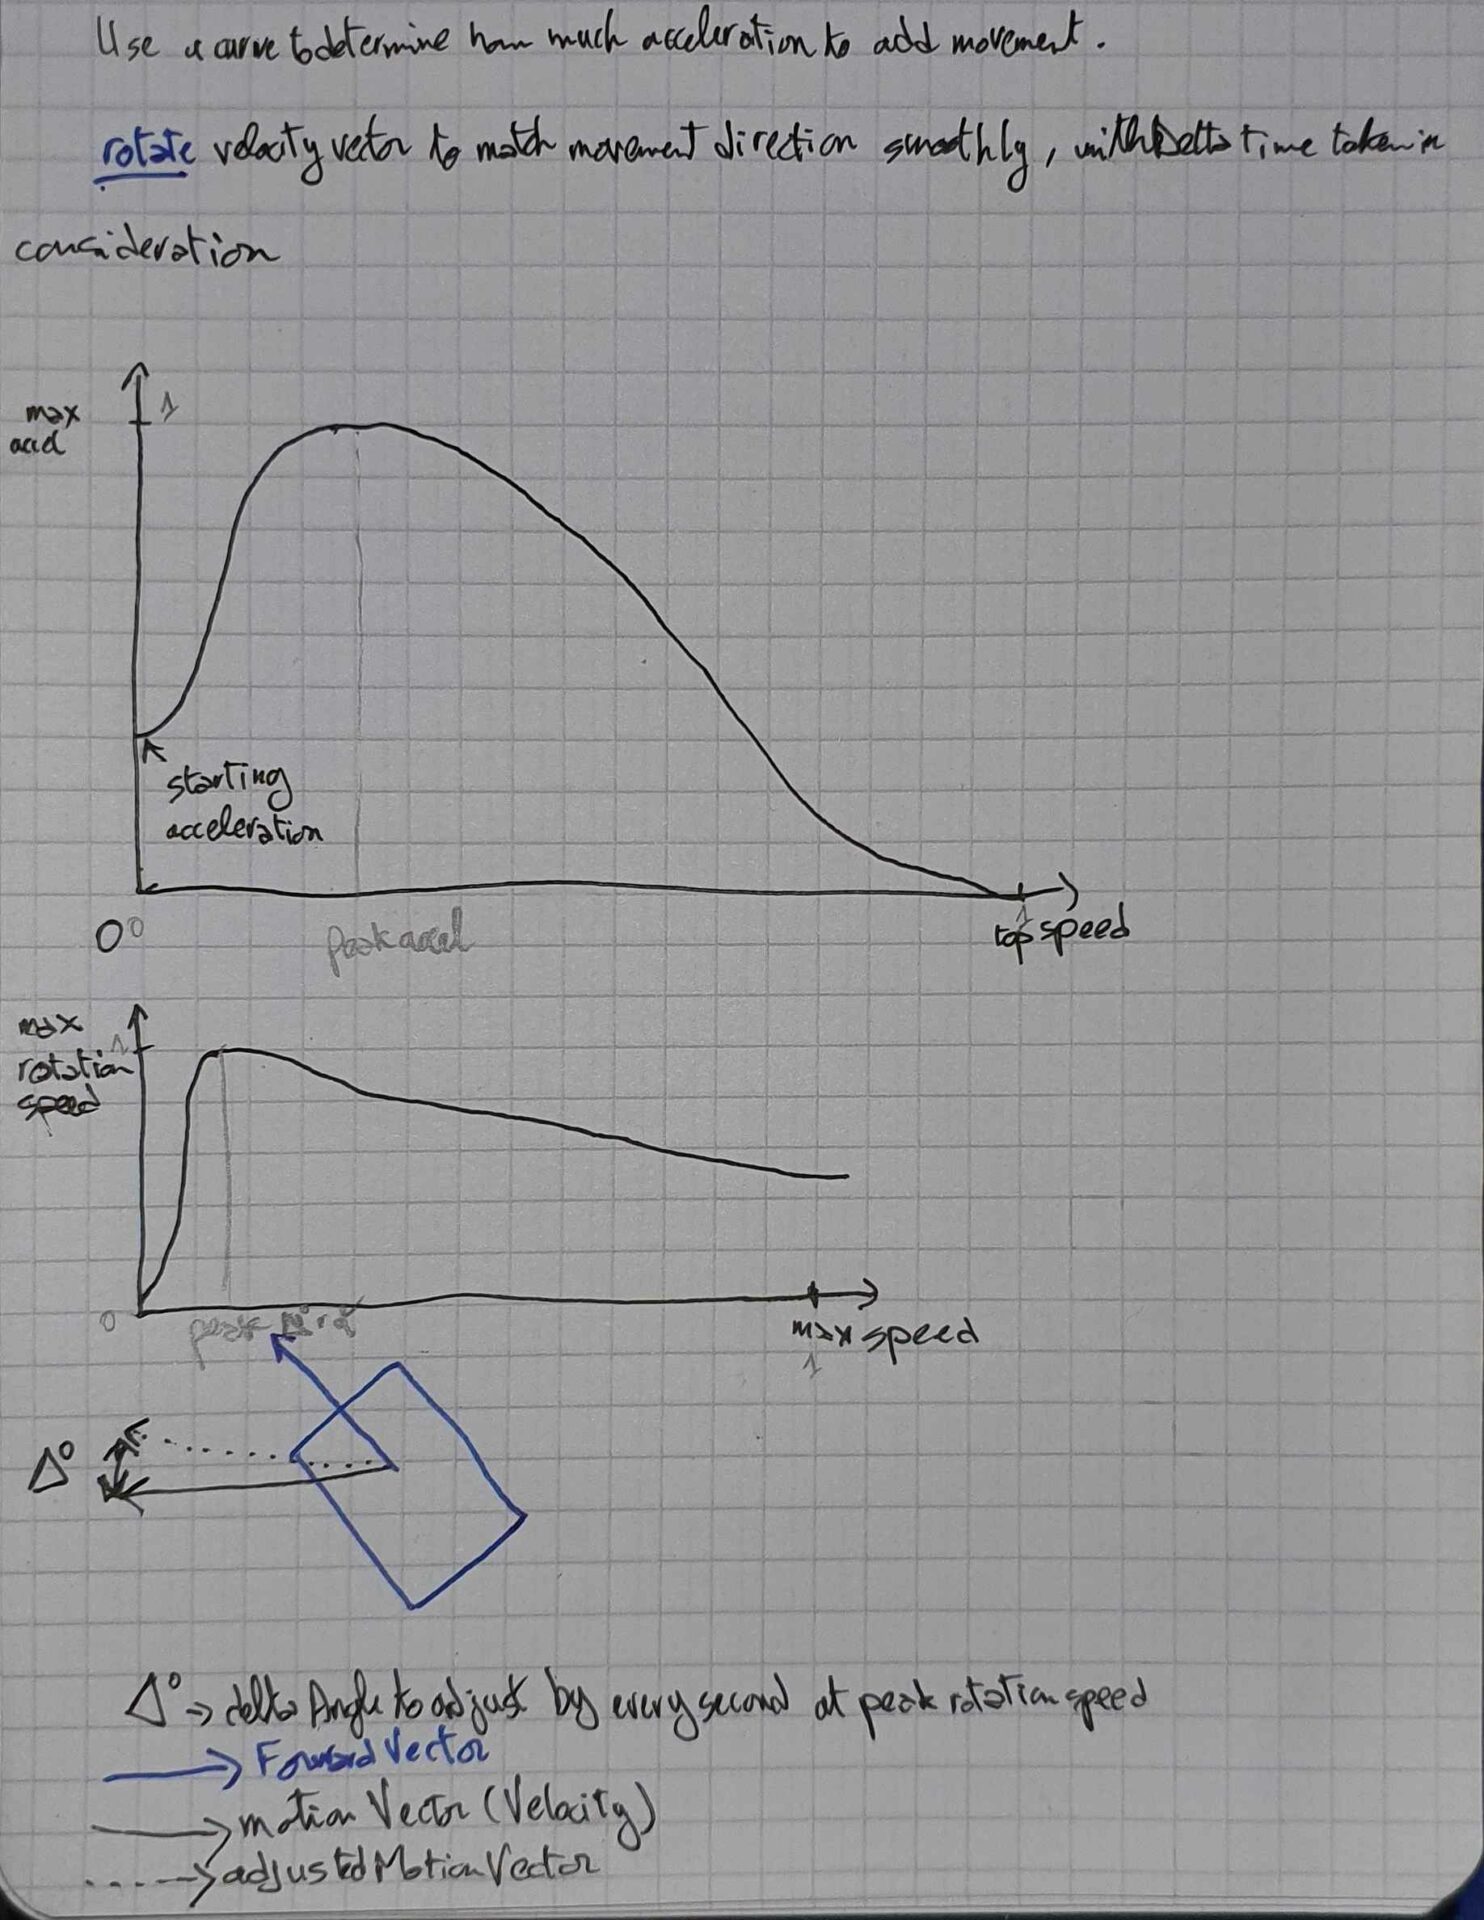
I’m still not too happy with the way it’s working right now with manually setting movement direction and such, because it’s not working nicely with the collisions and gravity, so I’m going to switch to adding acceleration instead and letting the physics engine handle the rest.
I’ll add acceleration and rotation speed curves (relative to max speed), which will allow me to iterate fast and adjust how it feels.
Other stuff
I am currently writing character stories and moving the game story to Obsidian , which has exactly the features I’ve been looking for. I am also migrating my notes and bookmarks from other apps.
I played Red Dead Redemption and Who’s Lila. One thing I noticed was how linear the story of Red Dead Redemption was : you only make one choice, and it’s wether to kill someone or walk away and let the others have the pleasure. There are no dialog options or anything like that, not in the main story at least. It’s still became my favorite Rockstar Games game, which proves that you don’t always need dialog options and branching paths to deliver a compelling story.
Who’s Lila is the polar opposite. There are over 16 different paths, and finding them all was interesting. It got a bit tedious with some of them, even with the gameplay not taking more than 10 minutes at most. I liked the 4th wall breaking puzzles (ARGs?). The story is simple enough, but the delivery is great.
I gathered a lot of references for a walkie talkie and a rotary drill, which I’m going to model next for my portfolio.
That’s all for this devlog, thanks for reading, and have a nice day.
One thought on “Devlog Week 59-60”
Obsidian is great XD I moved pretty much everything I needed to manage over to it 😀