
Dialog variables
I needed to make the dialog adjust for the player character’s name, gender, age…etc. So I added variables to the dialog. For example : Hello $PlayerName$ becomes Hello Abdou. Of course this can be anything, but for now I just need it for name and pronouns when the player is referred to in third person. This can be changed dynamically during runtime too, so there are even more possibilities I can’t think of yet. In theory this can be used to rewrite entire dialog lines.
If I want a “$” sign I can type “$$” and it will not be interpreted as a variable. That’s how I displayed the original “unmodified” sentence below, I just typed “$$” for each “$” in it and it didn’t get interpreted.
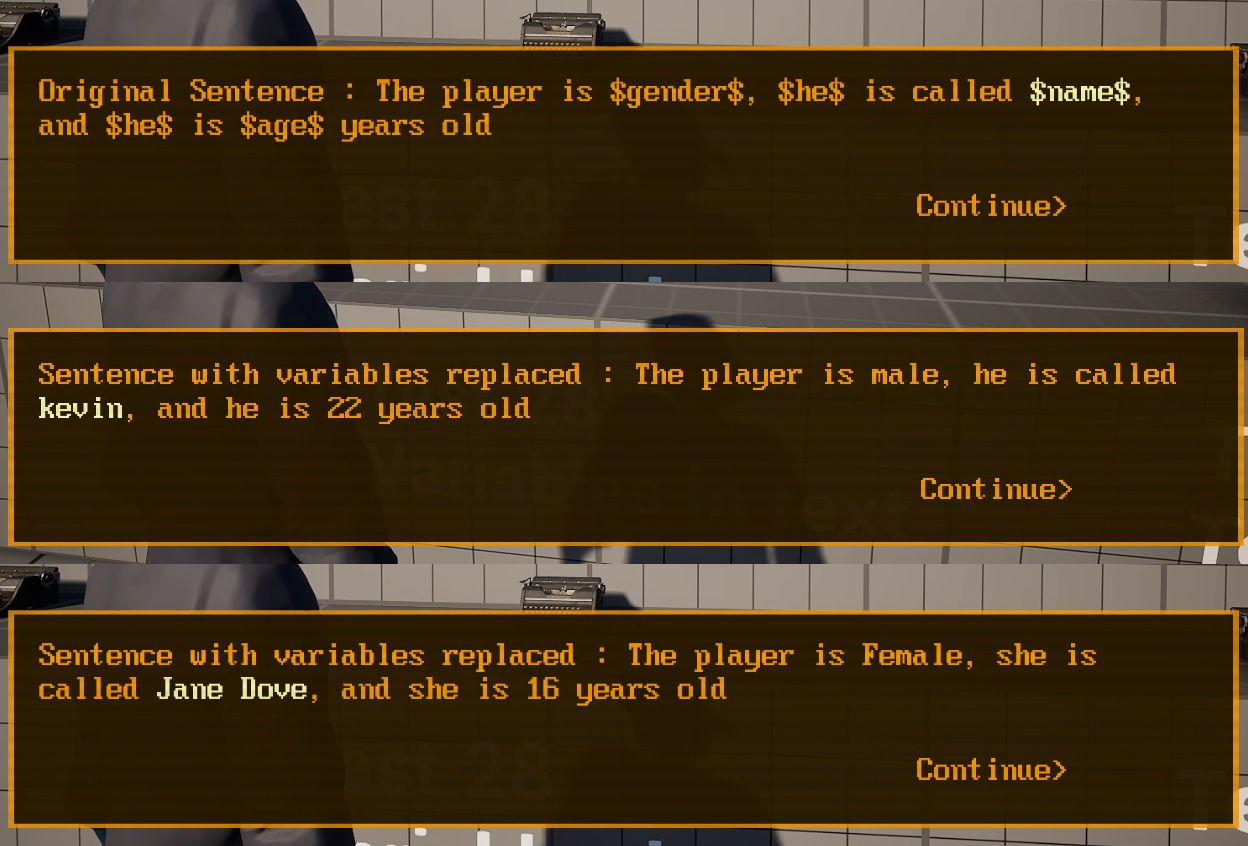
To store the variables, I used a struct of two strings : an identifier and its value, then I stored an array of that struct in the game instace. When a variable is reached in the dialog, the interaction system will search in the list for the identifier, and if it’s found, it will replace it with the content.
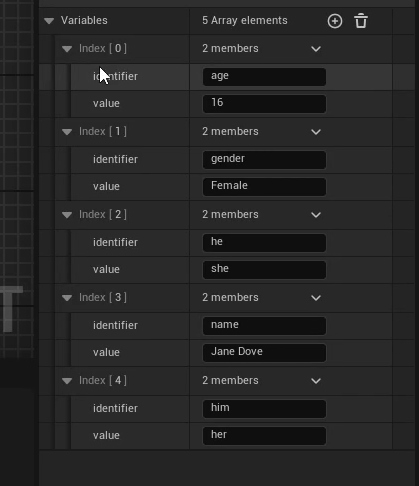
Here’s a funny glitch that happened because I forgot to account for the string changing size when replacing parts of it. I fixed it by comparing the length of the $VariableName$ and the replacement string and adding an offset to the start and end character indices.

Custom interaction prompt text
I made the interaction text customizable per-object. The default value is “Interact”, but it can be set for example to “talk” or “play” or “open”. It can even be changed dynamically during run-time, for example it says “open” when the door is closed, and “close” when it’s open. It’s one of those features that take less than 10 minutes to implement, but have a significant impact on gameplay.
Interaction type : Custom Action
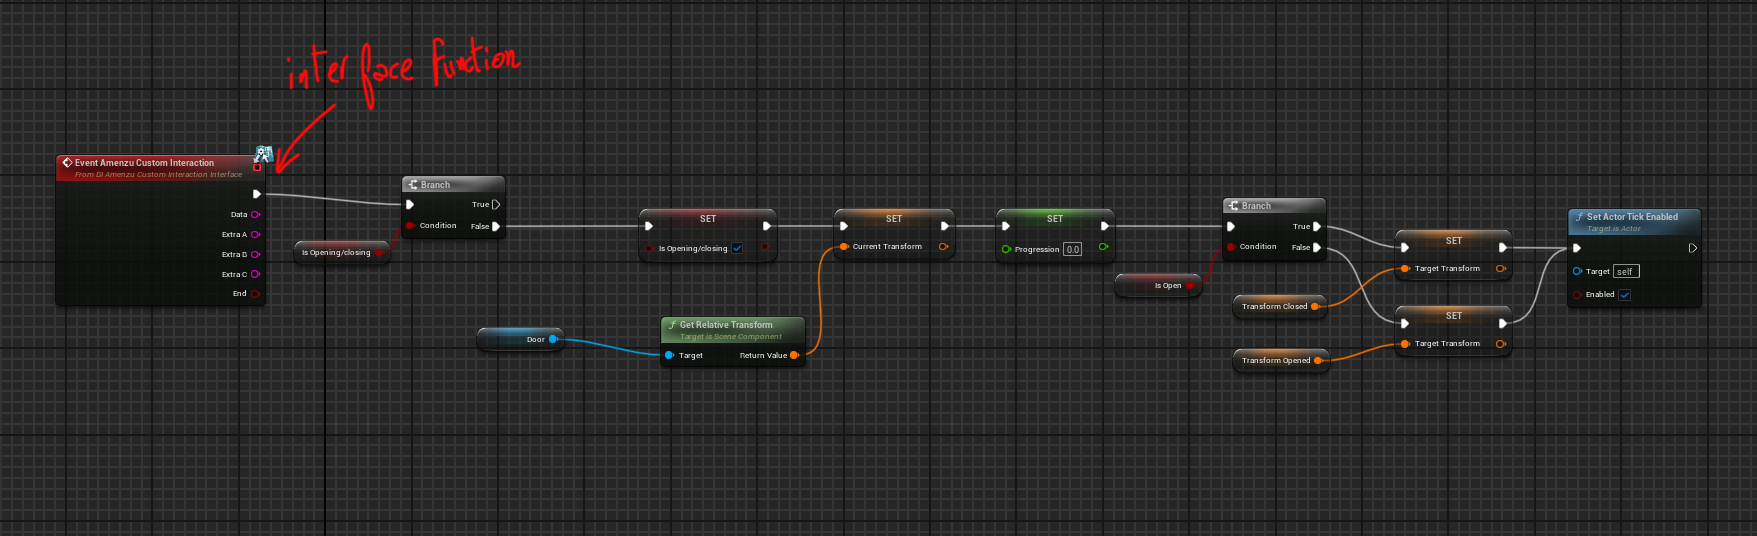
One of the main reason I refactored the interaction system to use components instead of predefined blueprints is to allow for custom interactions. Previously I was limited to just one or two blueprint types, and I had to write code to support every type I add. That gets cumbersome really quick. But since I made the interaction system a blueprint component can attach to any actor of any kind, it’s super easy to have custom blueprint called by the interaction system : just check if the actor has implements an interface function I called “Amenzu Custom Interaction Interface”, and then execute it.
Interface functions are basically predefined function types that always have the same name and parameters, but the implementation (code to execute) can be different for each object. In the example below it’s a part of the code for opening and closing doors. The interface function has extra parameters I can set up in the data table (Data, Extra A, Extra B, Extra C, and End), which I don’t really need here, but they can be useful in the future.
Opening doors
Here’s a more complete example of the custom interaction mentioned above : opening and closing a door. It started as a very simple proof of concept, but I got carried away and ended up over-engineering it to move the player character out of the way when too close. Opening/closing doors is an important mechanic, so it’s justified at least.
The Blueprint is very generic and can be reused. I can change the door and door frame meshes, the transforms (location, rotation and scale) for the open and closed state, and also the opening/closing speed. Here’s an example with silly open state transforms just for demonstration.
One of the issues I had with the opening doors was with the collisions. The player’s collision seems to be in sleep mode when not moving for some reason. So when the door opens, the player character often gets pushed inside and the camera gets wonky. I initially thought of moving the character very slightly, just enough to enable the collisions, but then when I had all that programmed I thought “why not just detect if the player is too close and make them move back?”, and so I did.
For that, I added a collision box and an arrow. I checked if the player’s origin is inside the box, and then added input in the direction of the arrow if the door is closed, or in the opposite direction if the door is already open. The player character keeps moving until the door is fully open, or until they’re outside the box, whichever happens first. The movement speed for the player and the door, as well as the box’s bounds and the arrow’s directions can be adjusted if needed, or even completely disabled if not needed.
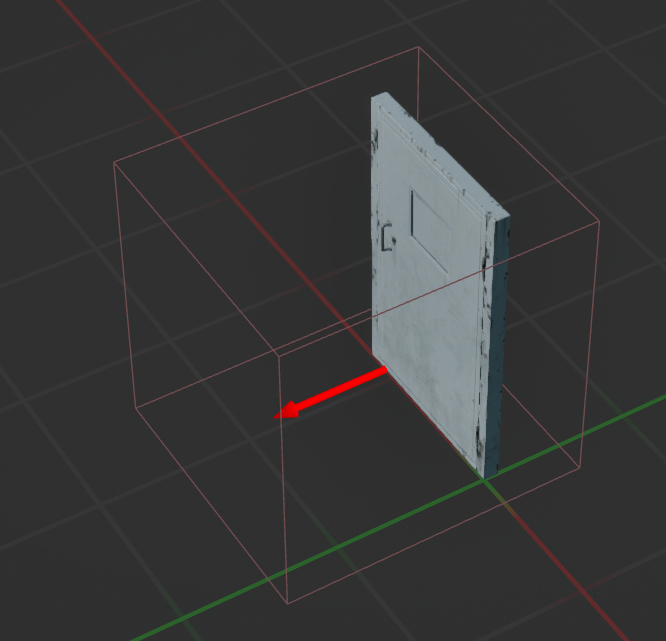
The blueprint is generic enough and it can be used for windows, sliding doors, elevators, buttons, or anything that moves/rotates/scales from state A to B.
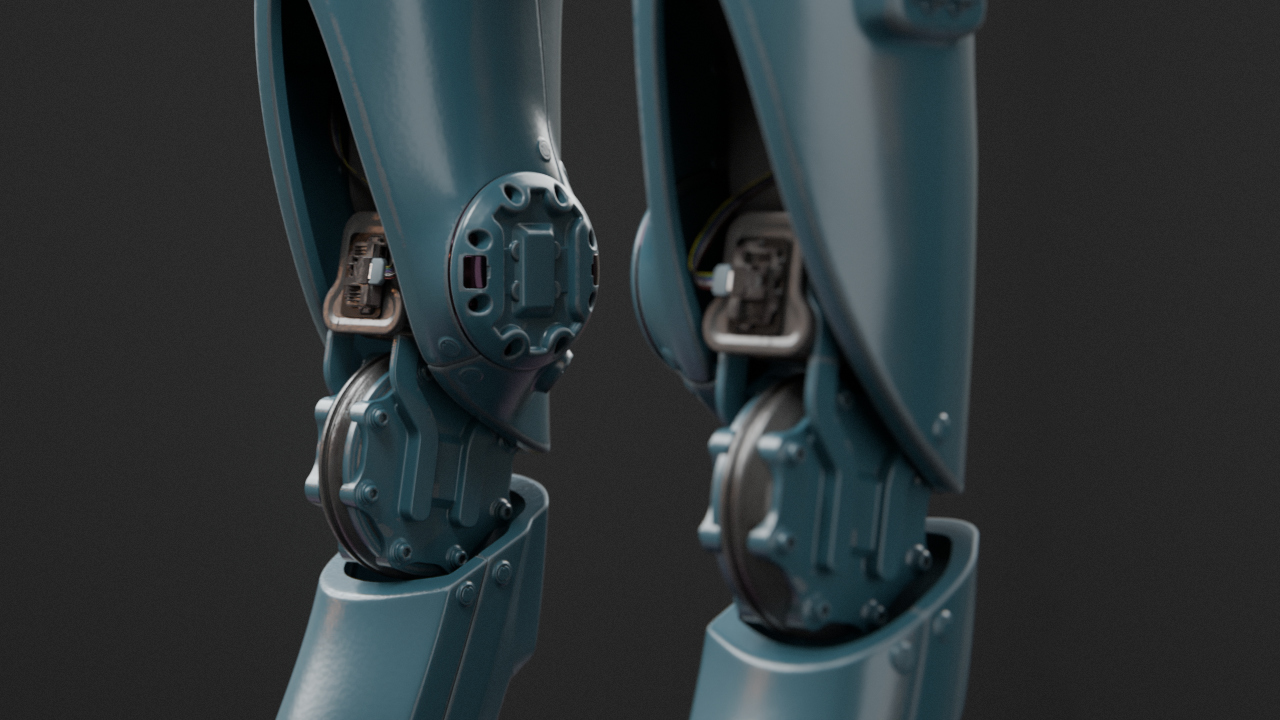
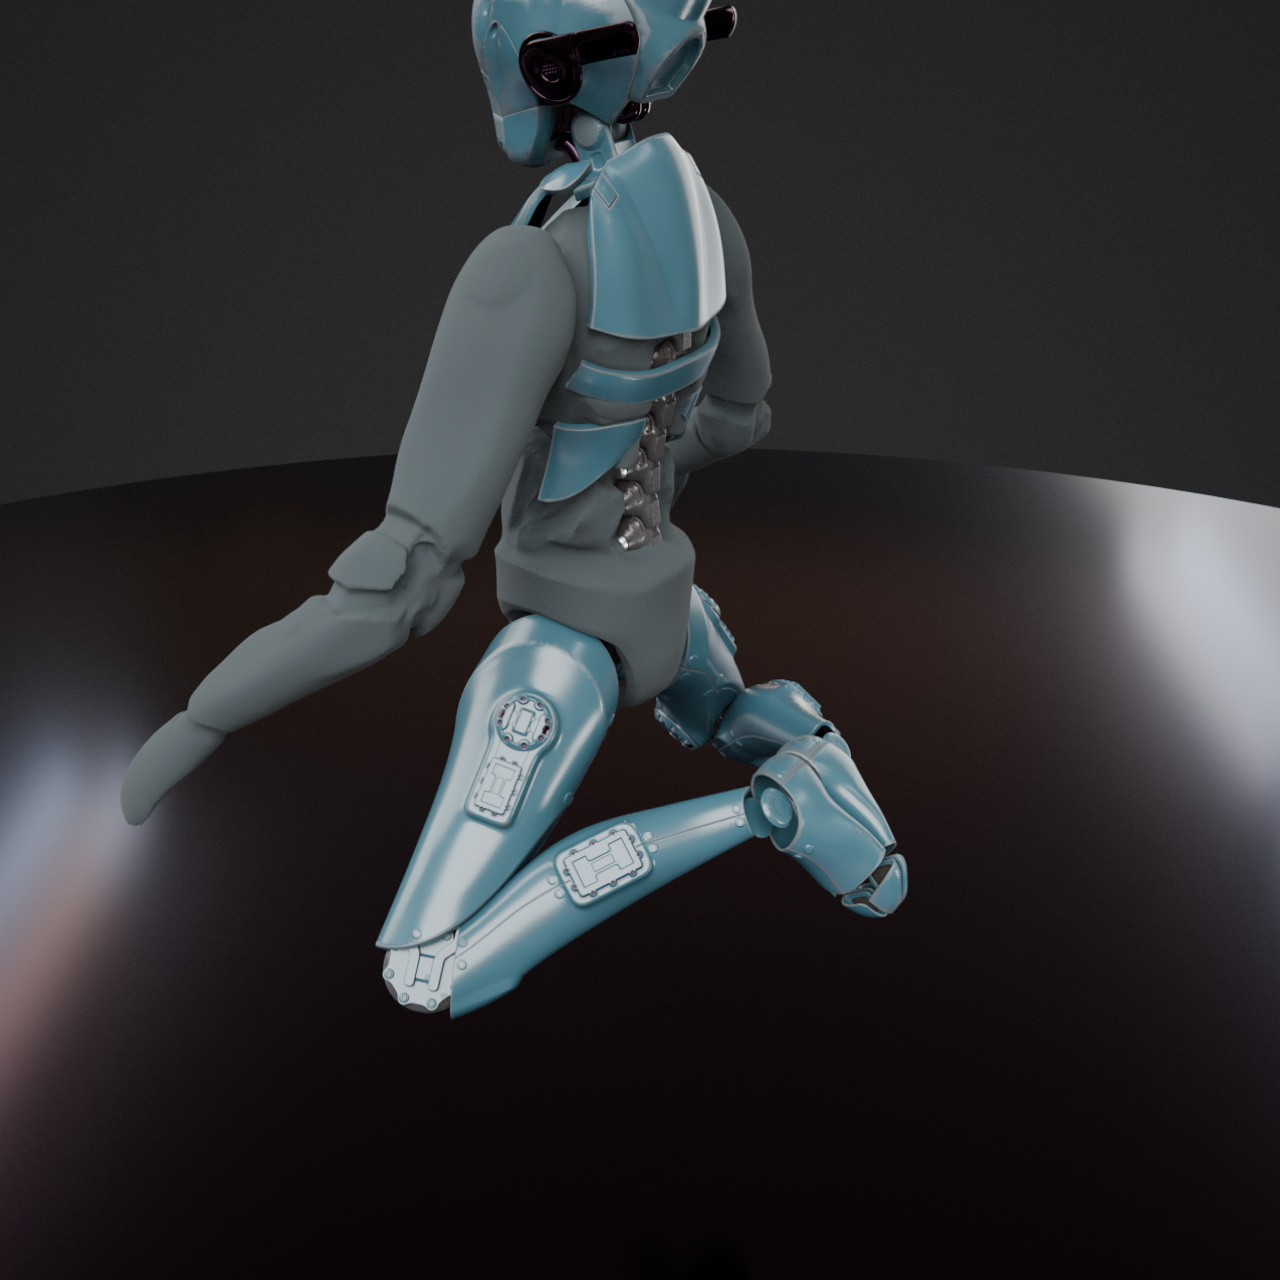
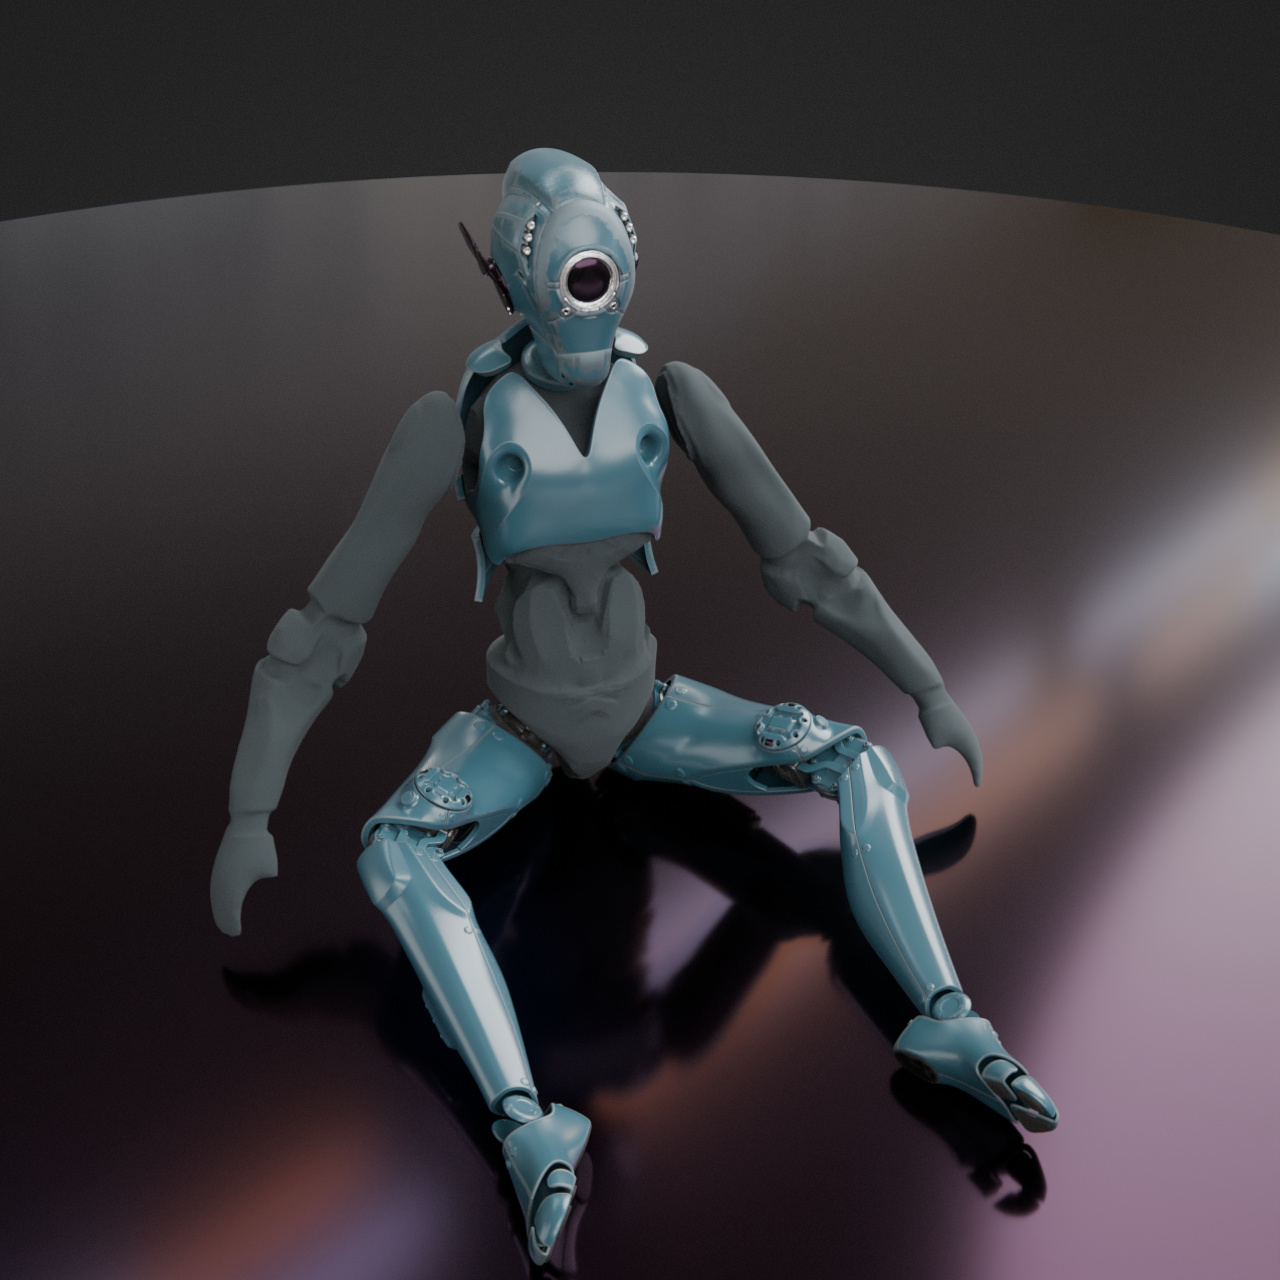
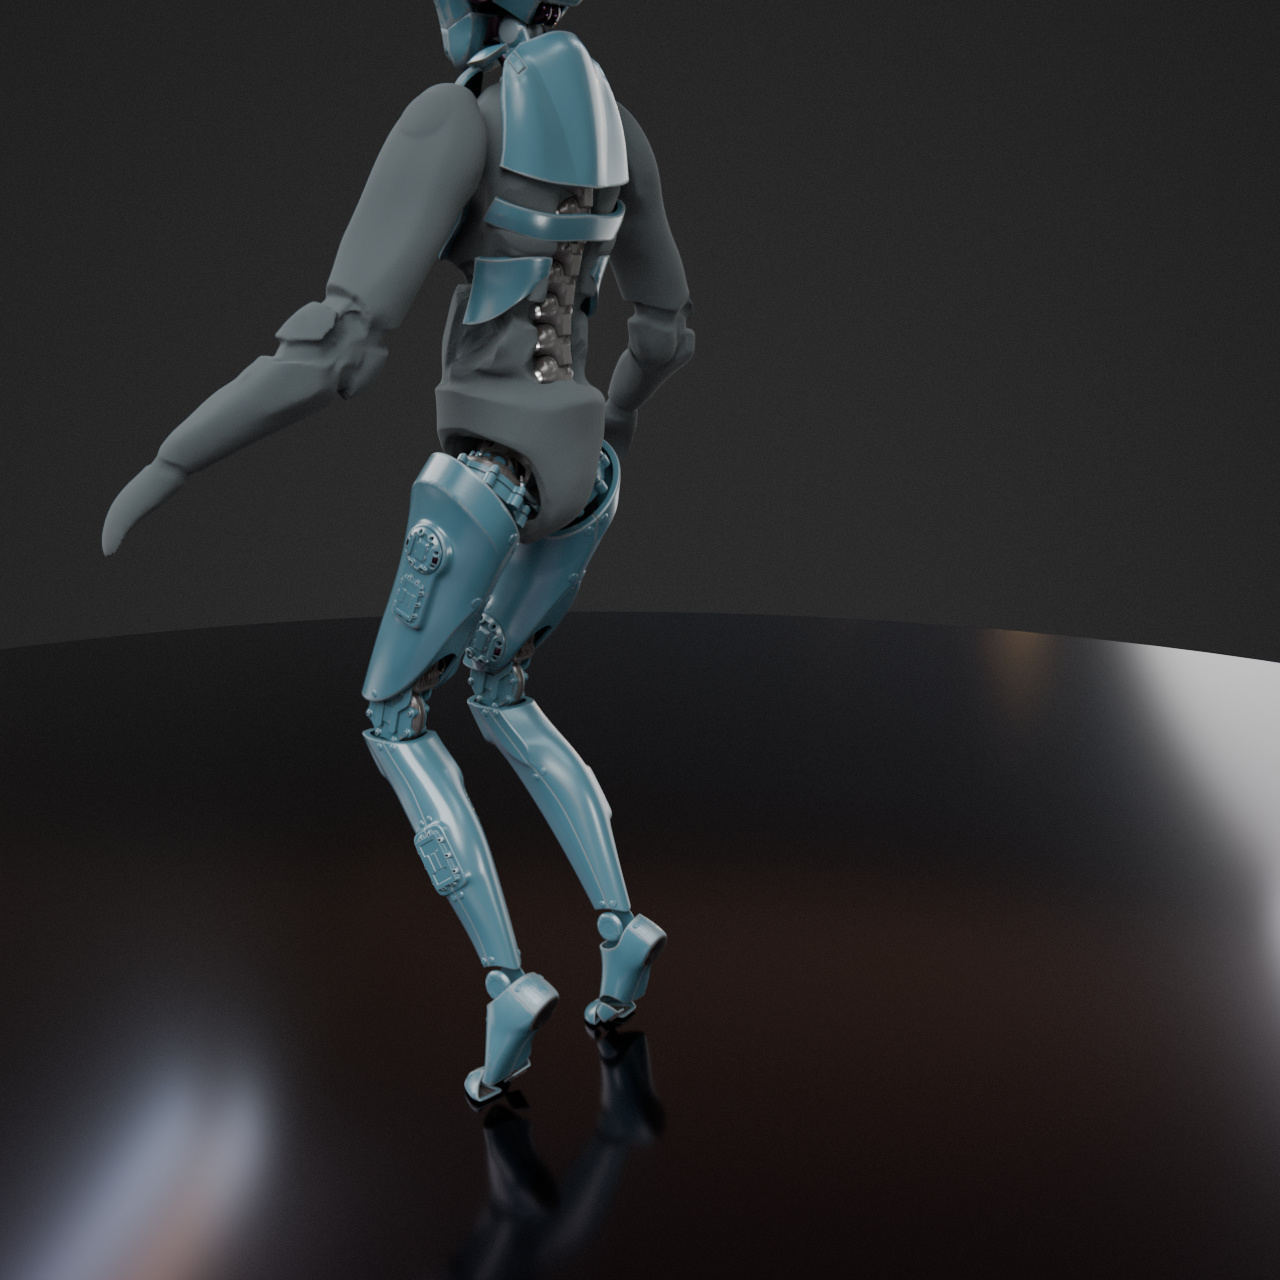
Robot model
I worked more on the robot character for the player and NPCs. I detailed the legs a bit too much, but it was fun, and I can reuse the internal parts for the chest and torso too.
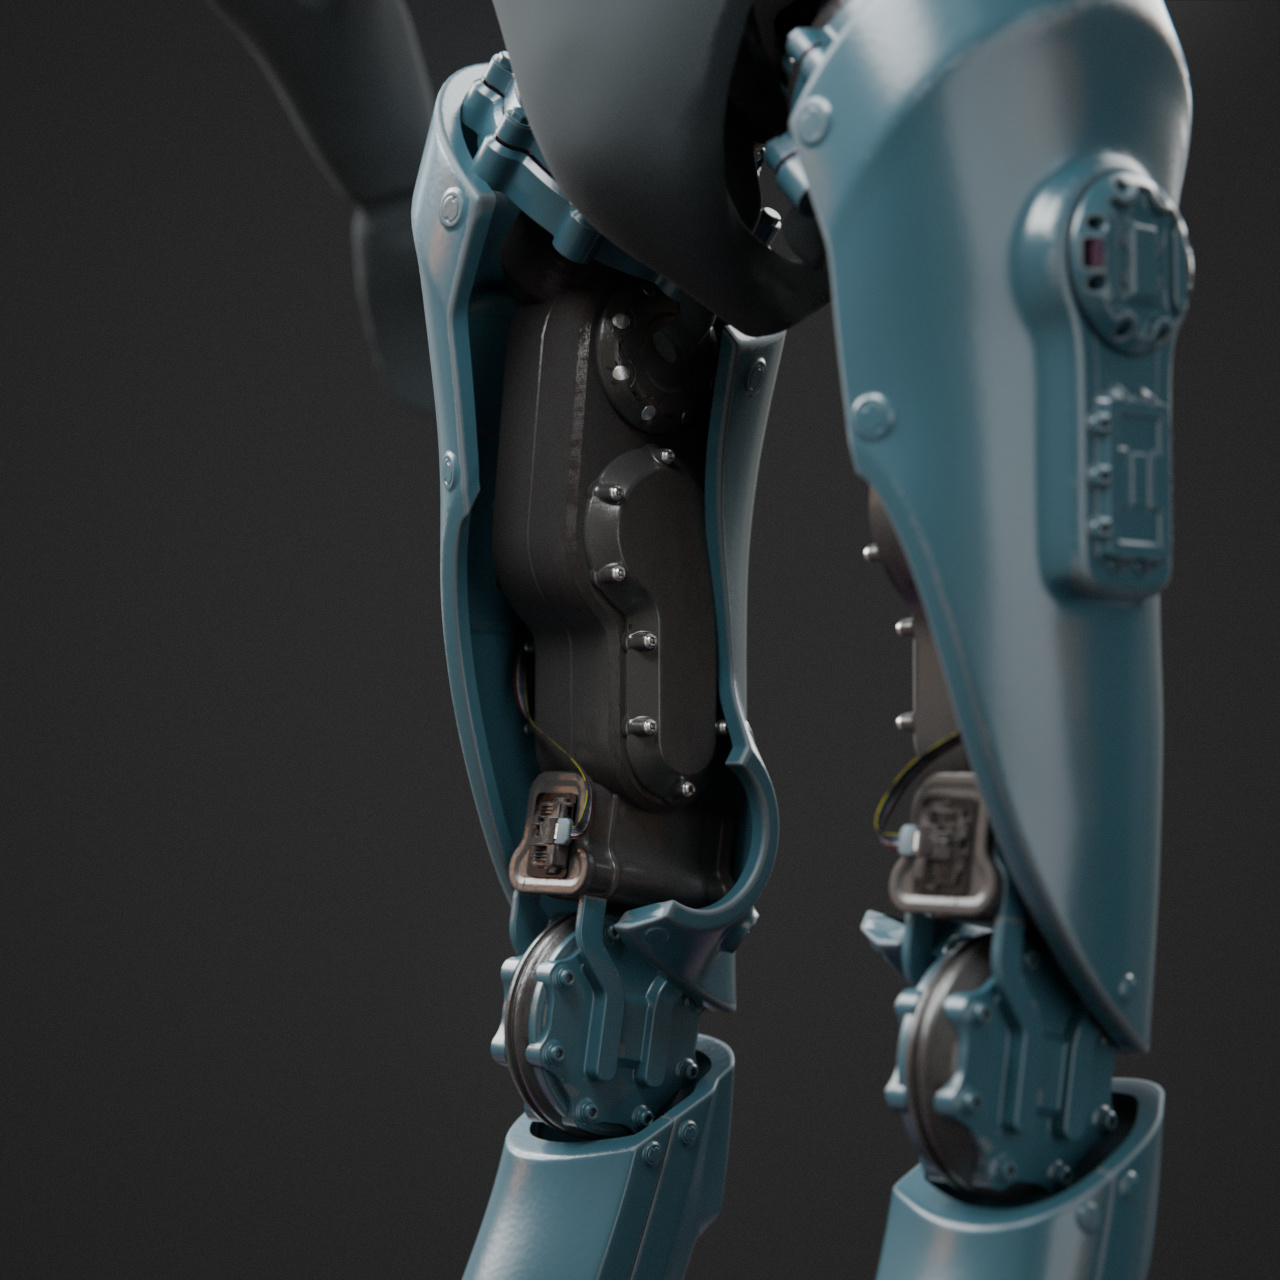
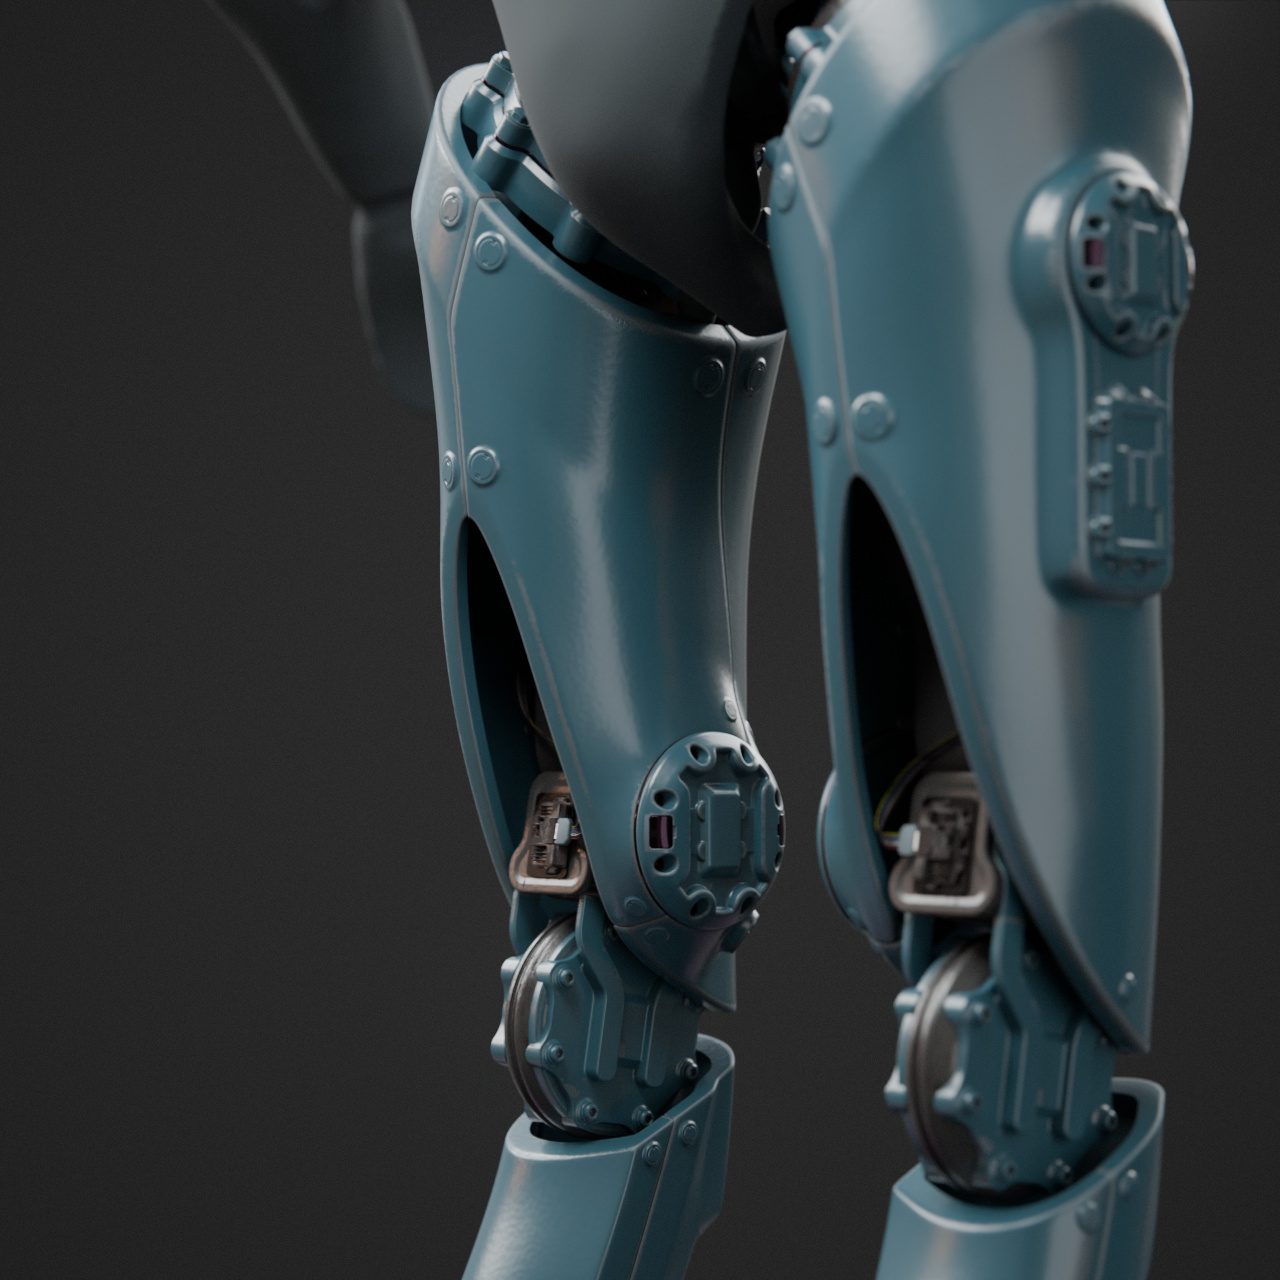
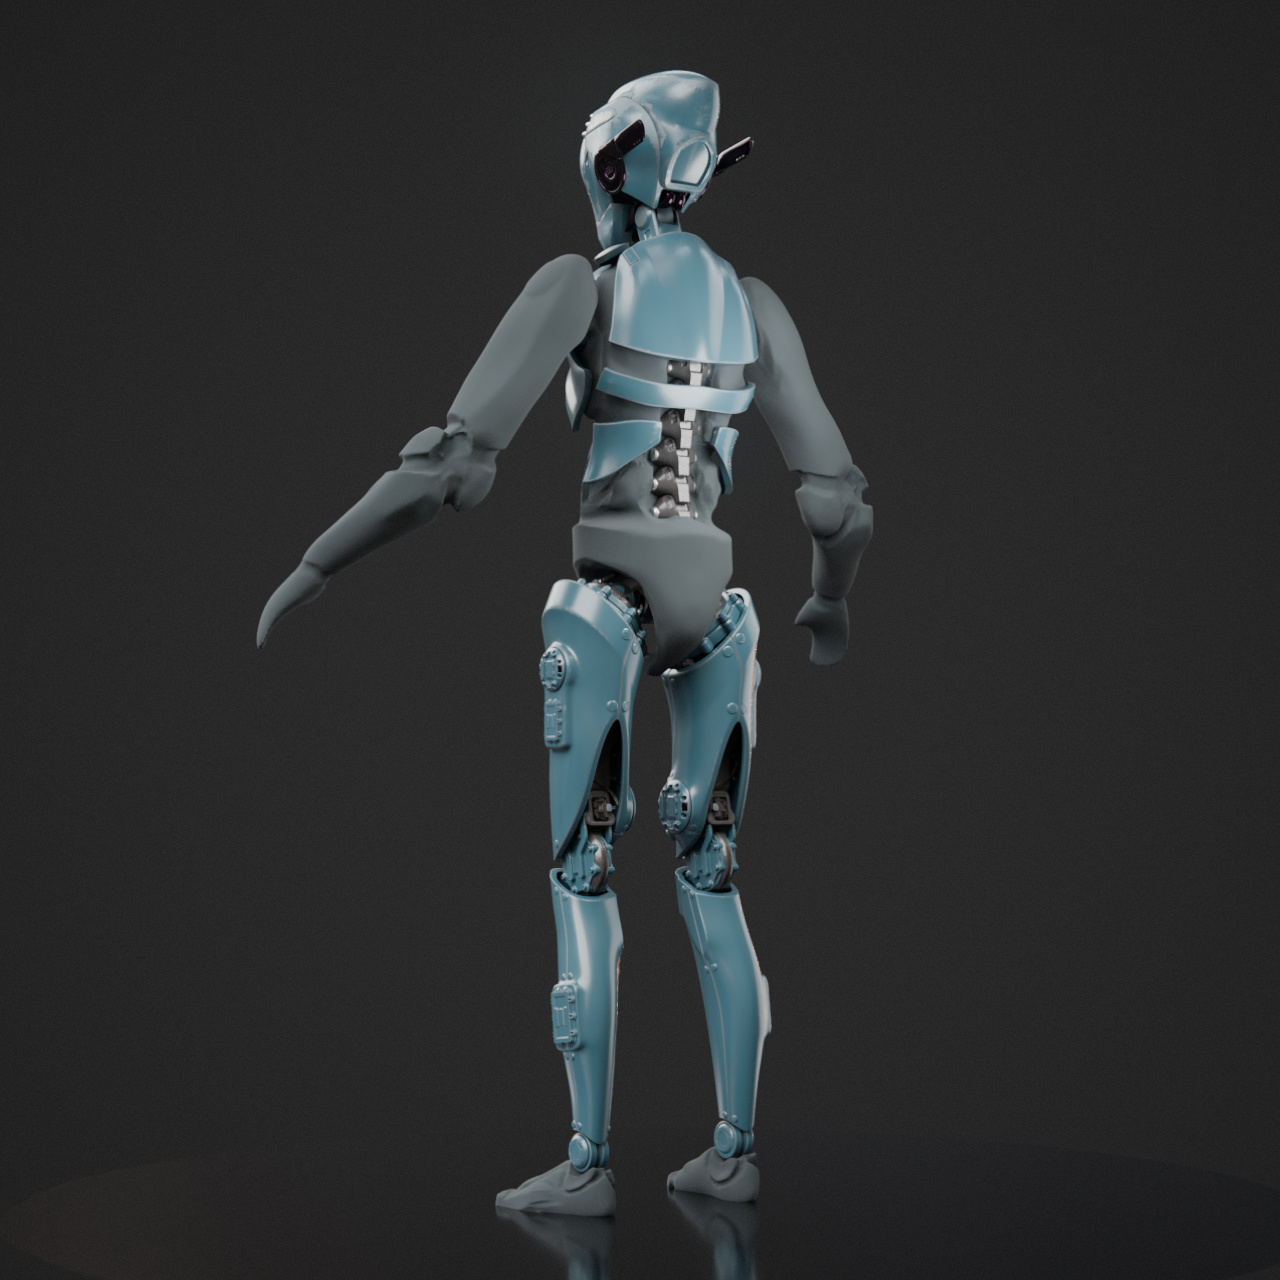
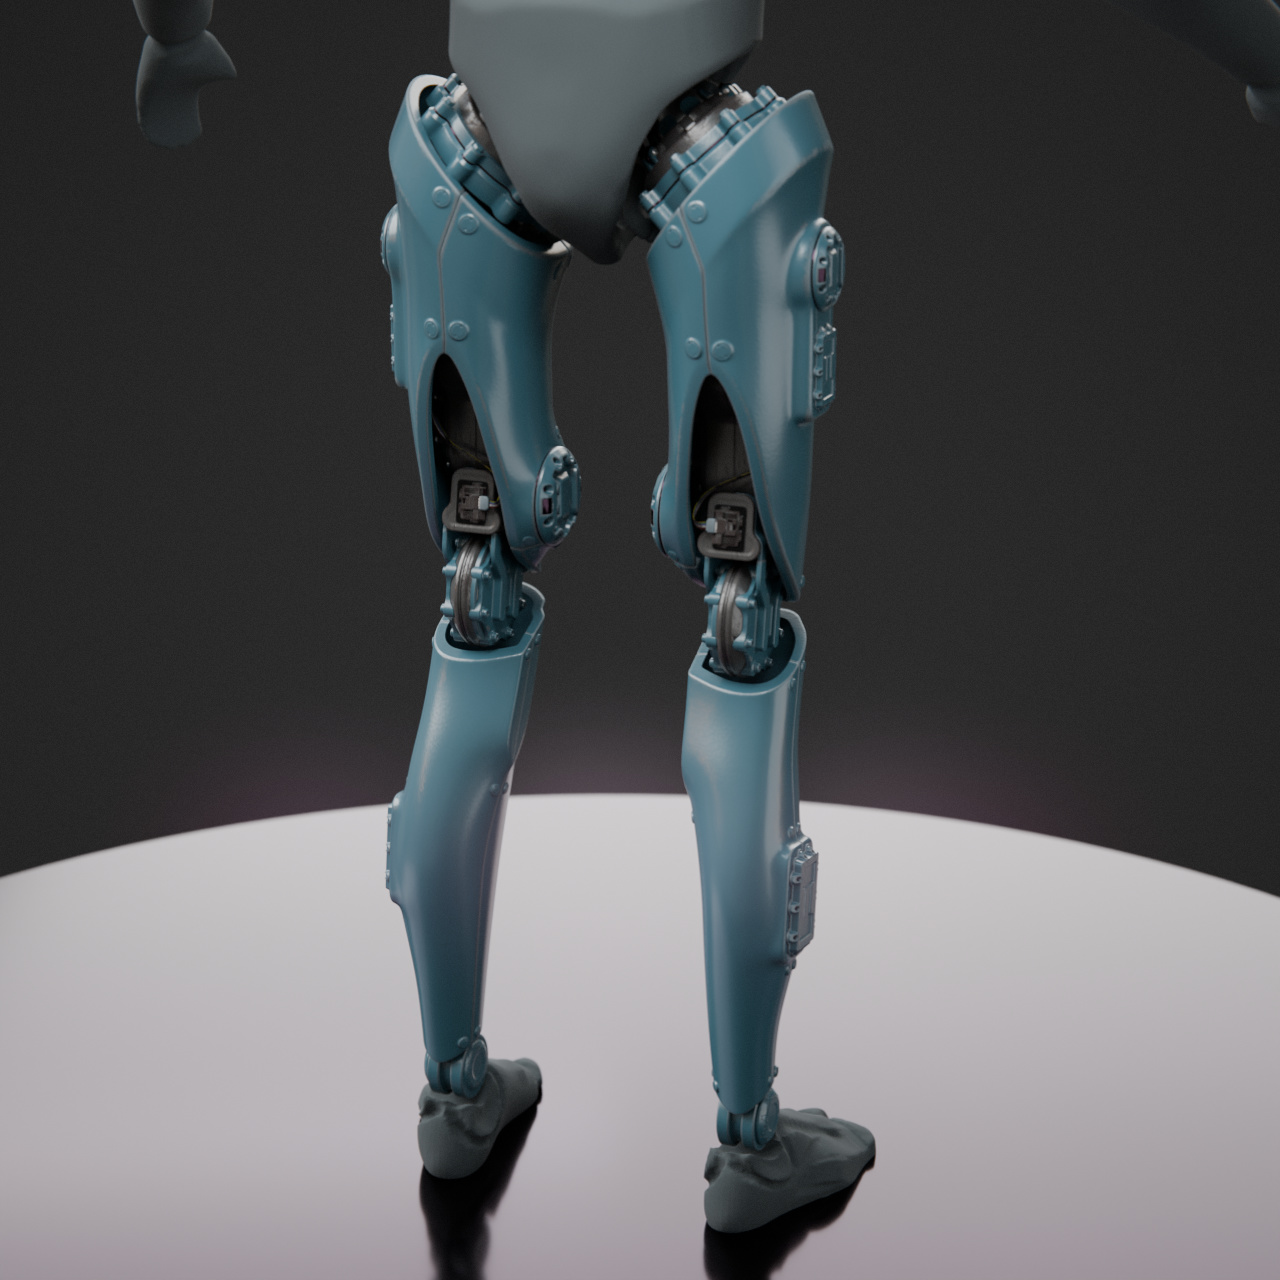
One of the challenges is balancing between function and keeping the retrofuturistic industrial aesthetic. I’m quite happy with the result. Here are some test poses to make sure the motion range is good without having to resort to cheating and deforming parts that shouldn’t deform. I will probably cheat a little bit with extreme poses, but it shouldn’t be noticeable
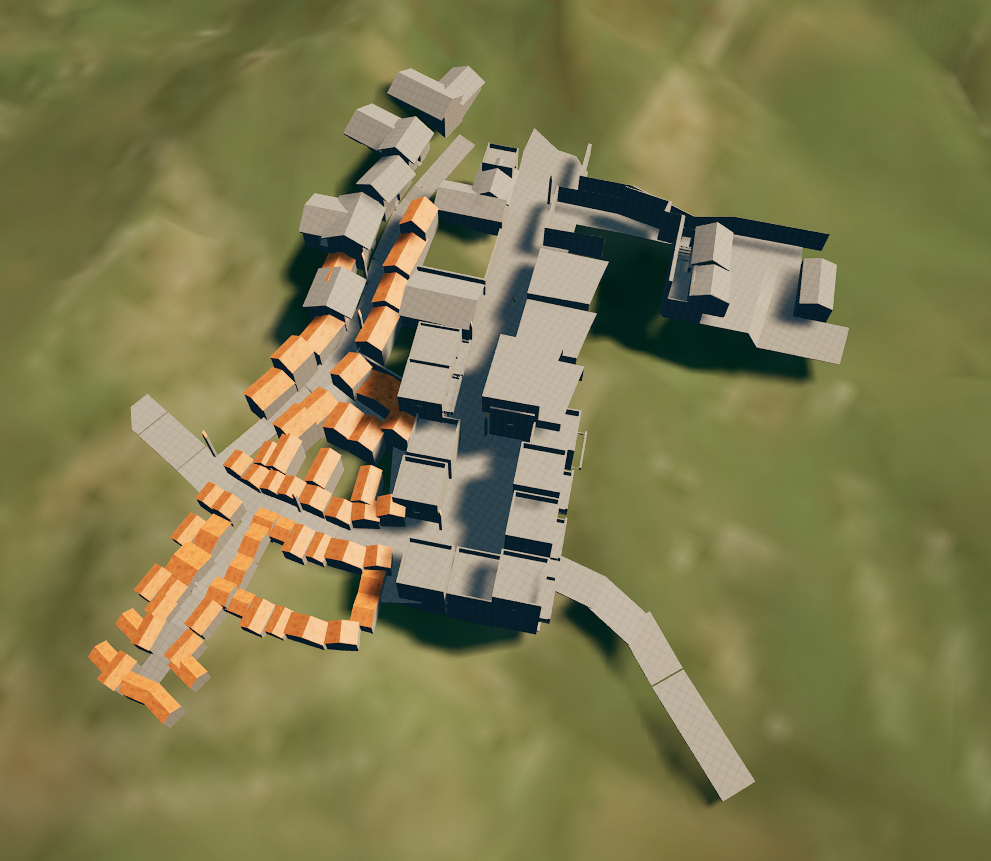
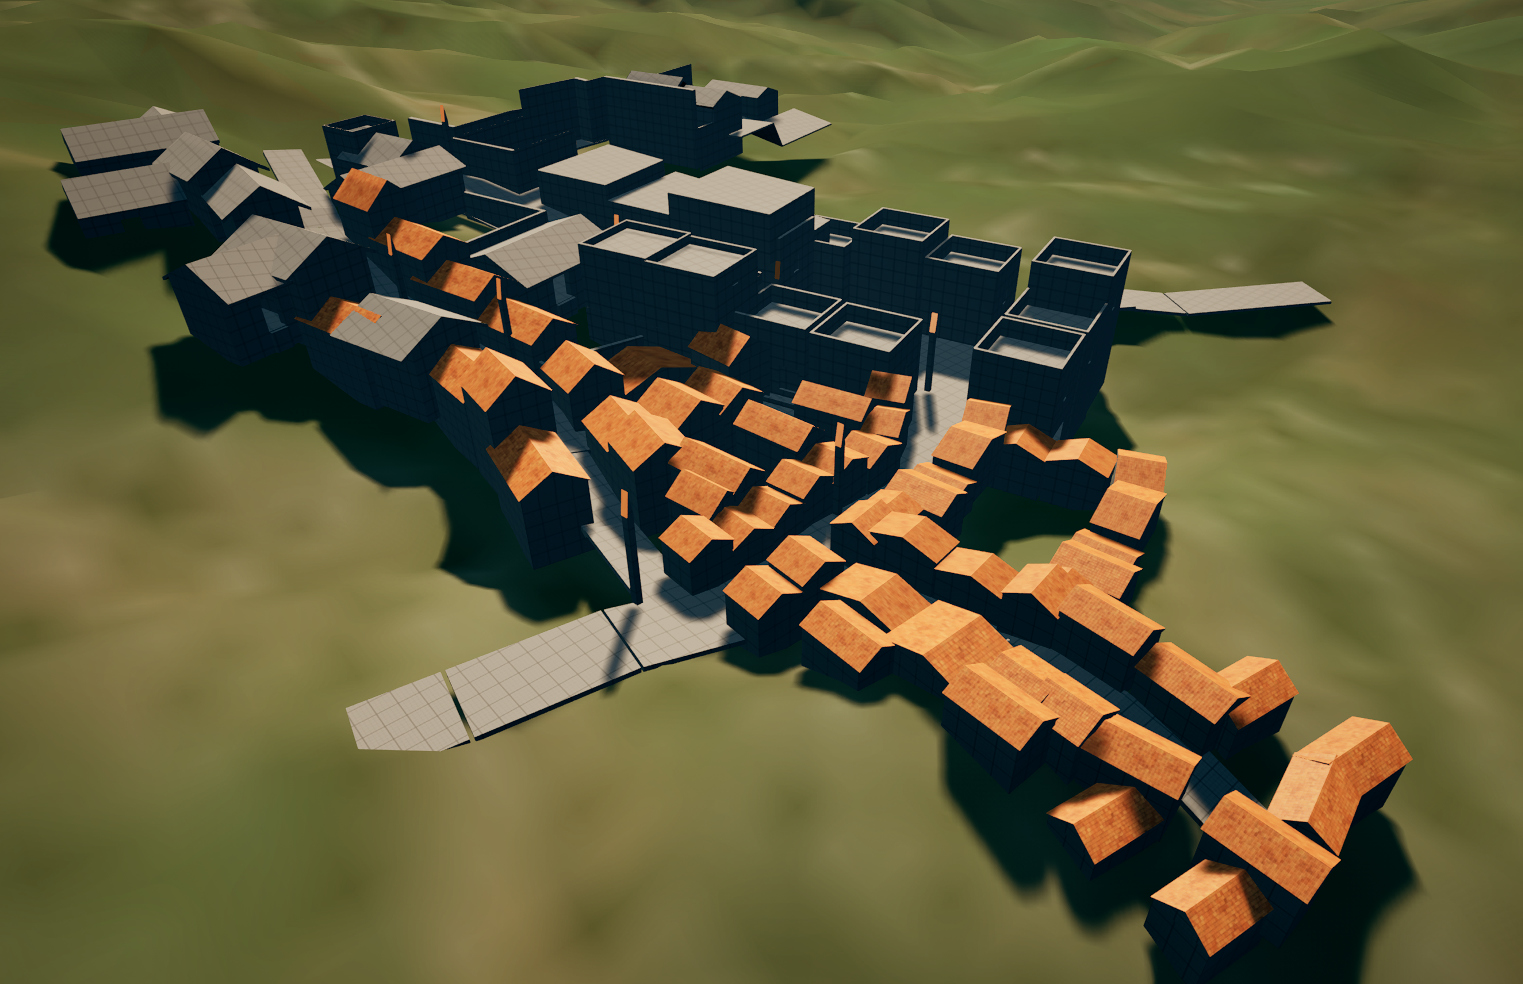
Spline tools
I experimented a bit with splines in Unreal. I started with a simple road generator that snaps on surfaces along the Z axis. This can also be used for fences.
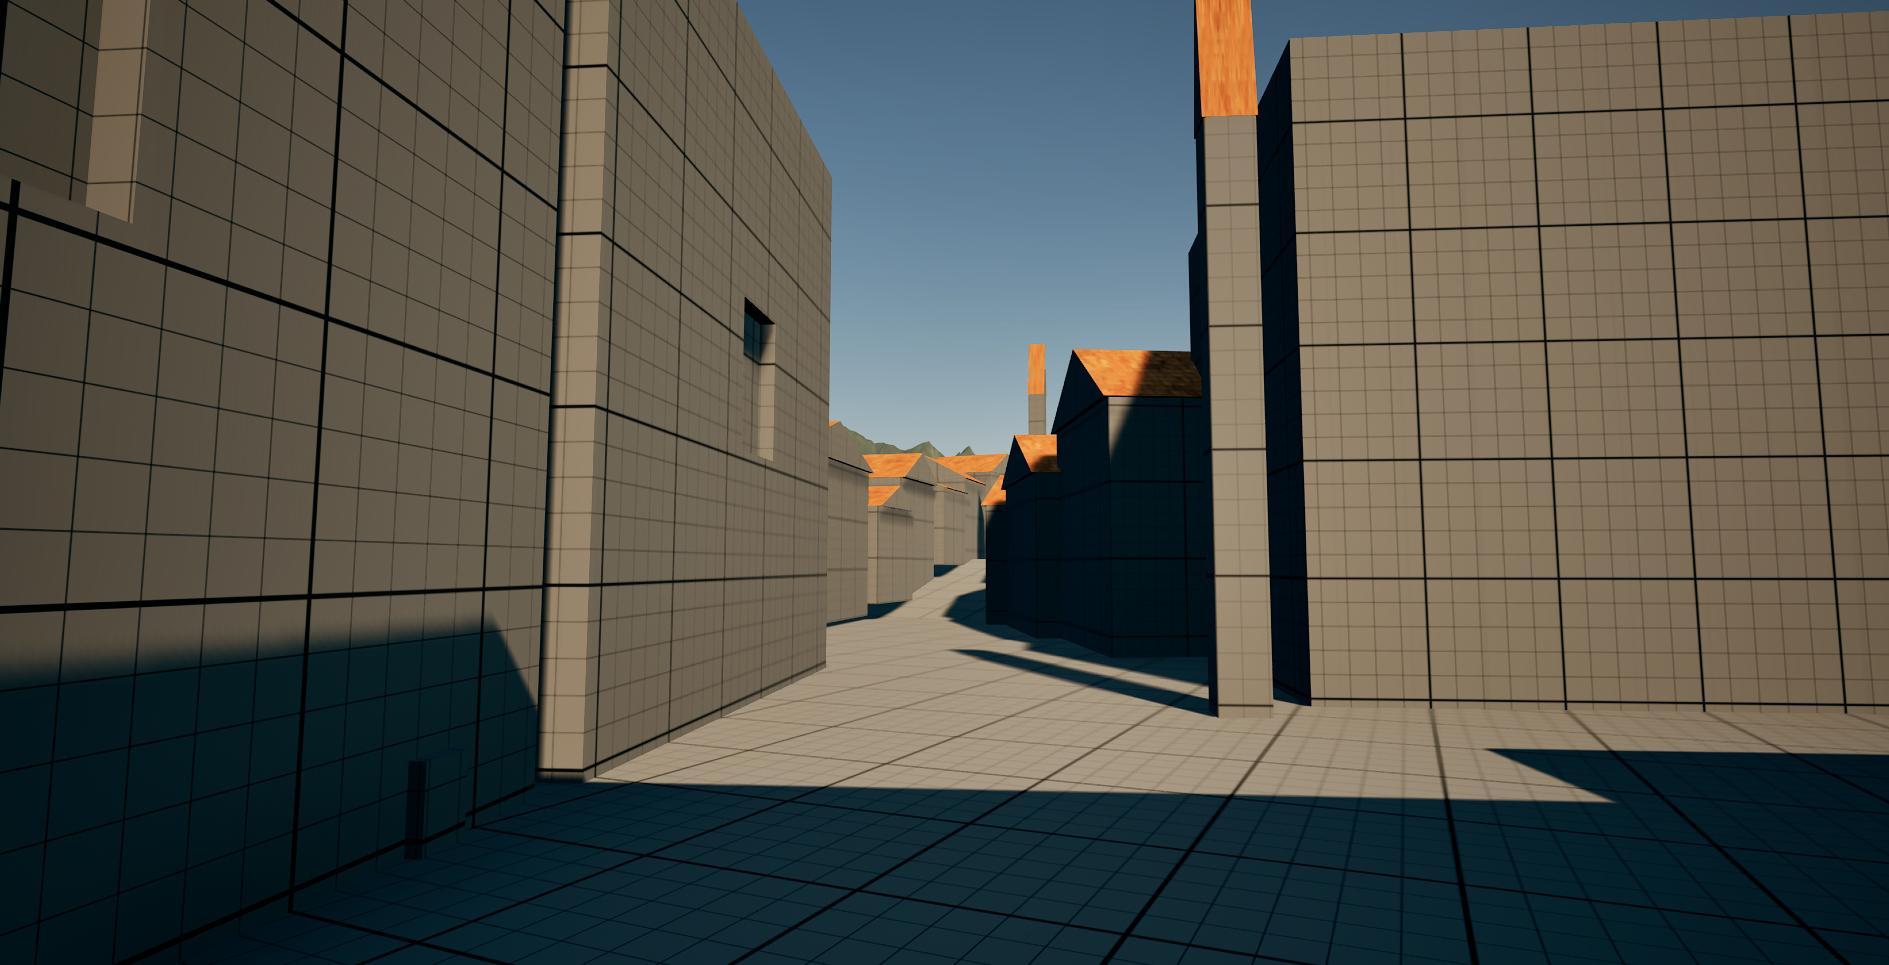
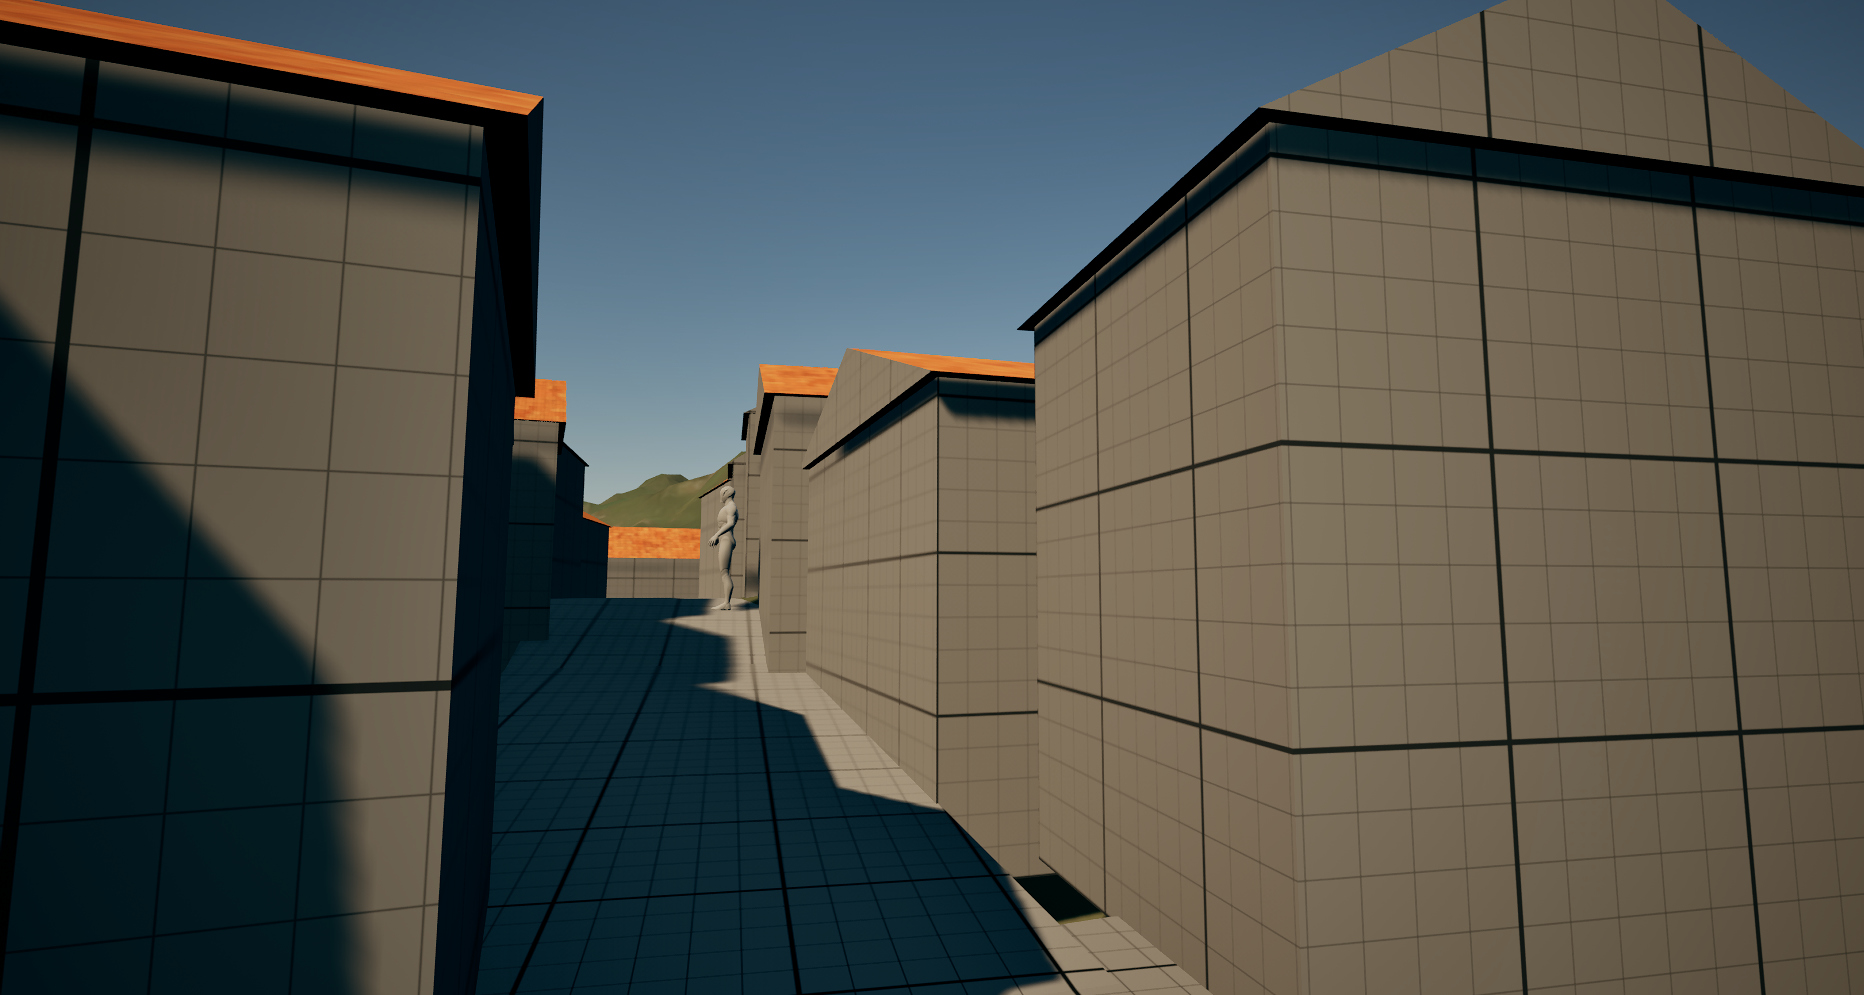
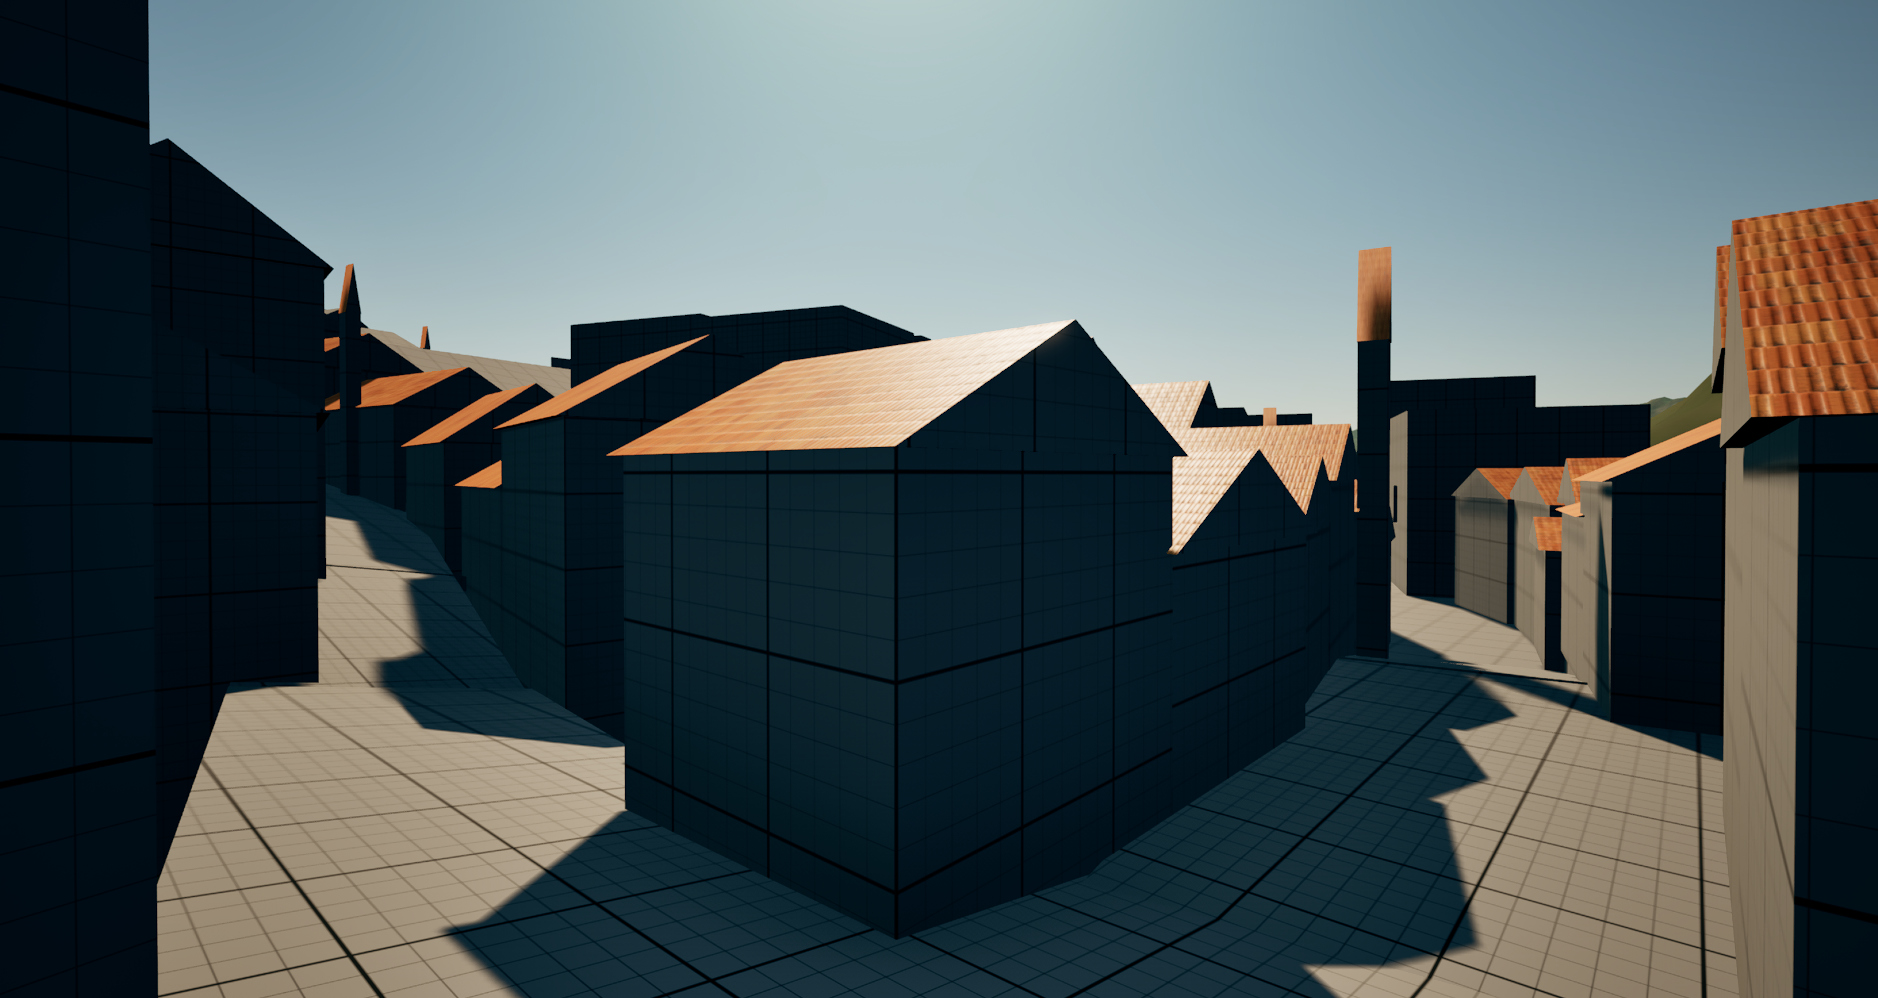
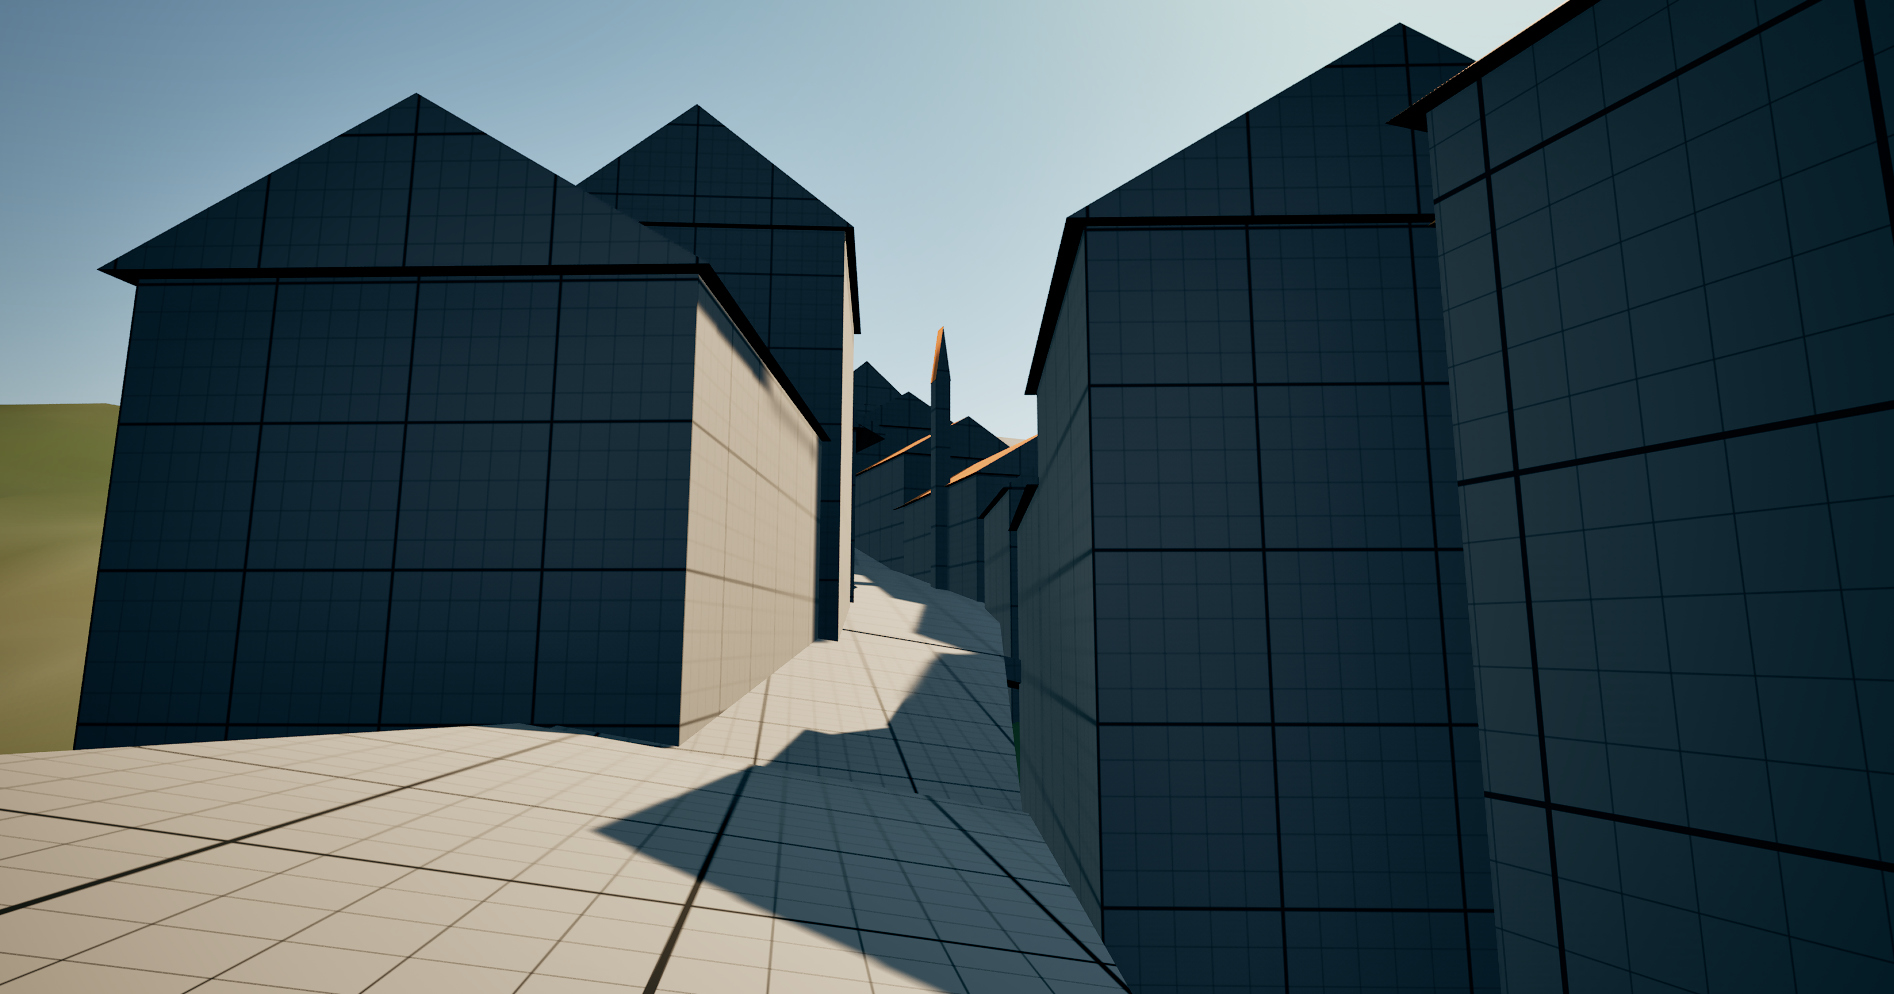
Environment Blockouts
More environment blockouts. This time starting with a smaller portion of the village and expanding little by little. I didn’t use the road spline tool yet, but it will speed things up.
That’s all for week #34. I’ll try to finish the robot model and work more on the blockouts this week.
Thanks for reading!